m (→NPCs) |
Tags: Visual edit apiedit |
||
| (36 intermediate revisions by 9 users not shown) | |||
| Line 1: | Line 1: | ||
| − | {{ |
+ | {{Infobox location |
|image = Crescent-hill.jpg |
|image = Crescent-hill.jpg |
||
| + | |banner = Banner_Crescent_Hill.png |
||
| − | |type = Maple beauty |
||
| + | |caption = Hostile maple leaves and fragrant flowers blanket the ground here. The stunning beauty makes it easy to see why religions were born here. |
||
| − | |level = 20-29 |
||
| − | | |
+ | |type = World Field |
| + | |level = 20-30 |
||
| − | |map=[[File:Map_Crescent_Hill.png|250px]] |
||
| + | |elite = • <Alluring Fragrance> [[Bayin]]<br/>• <The Glutton> [[Doniland]]<br/>• <Deadly Poison> [[Senka]]<br/>• <Troll Berserker> [[Varis]] |
||
| − | |bgm=[[File:Crescenthill.ogg]] |
||
| + | |portals = • [[Helonia Coast]]<br/>• [[Cactakara Forest]]<br/>• [[Navea]] |
||
| − | |dungeons=N/A}} |
||
| − | + | |location = South Midgard of [[Grazeus]], [[Terra]] |
|
| + | |setting = Maple trees, flower field |
||
| + | |inhabitants = Humans, Gnomes |
||
| + | |regions=• Lunarin<br/>• Clark Farm<br/>• Crescent Flower Field<br/>• Mistwalker Tribe<br/>• Altar of the Moon<br/>• Navea Outer District<br/>• Alabastren Temple Ruins |
||
| + | |dungeons=• [[Alabastren Temple]]<br/>• [[Former Site of Lunarin Village]]<br/>• [[Temple of the Eidolons]]<br/>• [[Gaia's Sanctuary]]<br/>• [[Lament of the Thunder Dragon King]] |
||
| + | |map=Map_Crescent_Hill.png |
||
| + | |bgm=Field [[File:bgm004.ogg]]<br/>Lunarin [[File:bgm004 1.ogg]]}} |
||
| + | Crescent''' Hill''' is a location in the world of [[Terra]], located in South Midgard of [[Grazeus]]. |
||
==Background== |
==Background== |
||
Crescent Hill is blanketed by red maple leaves and fragrant flowers. The stunning beauty may have resulted in Crescent Hill as the birthplace of religions. The Lunarin village often prepares for a sacred ceremony of flowers. |
Crescent Hill is blanketed by red maple leaves and fragrant flowers. The stunning beauty may have resulted in Crescent Hill as the birthplace of religions. The Lunarin village often prepares for a sacred ceremony of flowers. |
||
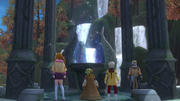
| + | The Crescent Ceremony is a festival held every year to honor the heroes who founded [[#Lunarin|Lunarin]]. Formerly held in the [[Alabastren Temple]] before it was closed down, the ceremony takes place in the [[#Altar of the Moon|Altar of the Moon]]. In the Ritual of the Blessings, the residents sing their praises and ask them to look after the people for another year. A wooden structure is created for the ceremony, and people gather flowers from the flower fields. In the Altar of the Moon, the people use the ceremonial vessels that balances the energy of the forest. During the ritual, the people read from the ceremonial tome, a book of spells formerly belonging to the Church of [[Navea]]. However, in recent years, the people, specifically outsiders, have strayed from the tradition, thinking of the ceremony as more of a nuisance than a blessing. |
||
| − | The Altar of the Moon is located in Crescent Hill, where the Eidolons and the blue cube can be found resting in the altar. |
||
| + | [[File:Crescent Ceremony.png|thumb|left|The Crescent Ceremony, as it takes place in the Altar of the Moon]] |
||
| − | The Alabastren Temple Ruins is located northeast of Crescent Hill. With the now broken seal, a dark energy is leaking out of the temple. |
||
| + | Recently, prior to the adventurer entering Crescent Hill, the ceremonial vessels, the tome, and the crescent gem were stolen from the people. It was later recovered in the Mistwalker Tribe area, a camp site for the [[Gnomes]], and the gem from Odum Ryan, third prince of the [[Makar]]s, in Alabastren Temple. The village chief, thankful for recovering the sacred items, rewards the Envoy of Gaia the key to the Starlight Treasure Chest. When the treasure chest was opened, an ancient, broken machinery was found and needed repairs from the [[Dwarf|dwarves]] in [[Cactakara Forest]]. |
||
| + | ==Campaign== |
||
| − | ==Places of Interests== |
||
| + | {{Main|Crescent Hill/Campaign}} |
||
| − | *Lunarin |
||
| + | |||
| − | ===Regions=== |
||
| + | ==Places of interests== |
||
| − | *<Clark Farm> |
||
| + | ===Lunarin=== |
||
| − | *<Crescent Flower Field> |
||
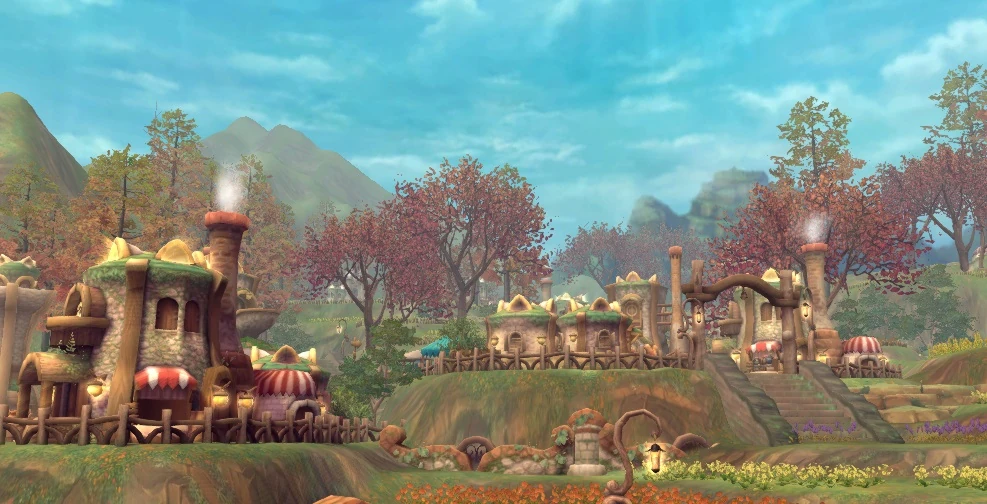
| + | [[File:Crescent Hill - Lunarin.jpg|thumb|Lunarin]] |
||
| − | *<Altar of the Moon> |
||
| + | Lunarin is a village located east of Crescent Hill. The village is run by the Lunarin Chief, [[Omar]]. Every year, the natives prepare for the Crescent Ceremony by gathering flowers from the nearby flower field and building a wooden structure. |
||
| − | *<Mistwalker Tribe> |
||
| + | {{clr}} |
||
| − | *<Alabastren Temple Ruins> |
||
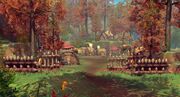
| + | ===Crescent Flower Field=== |
||
| − | *<Navea Outer District> |
||
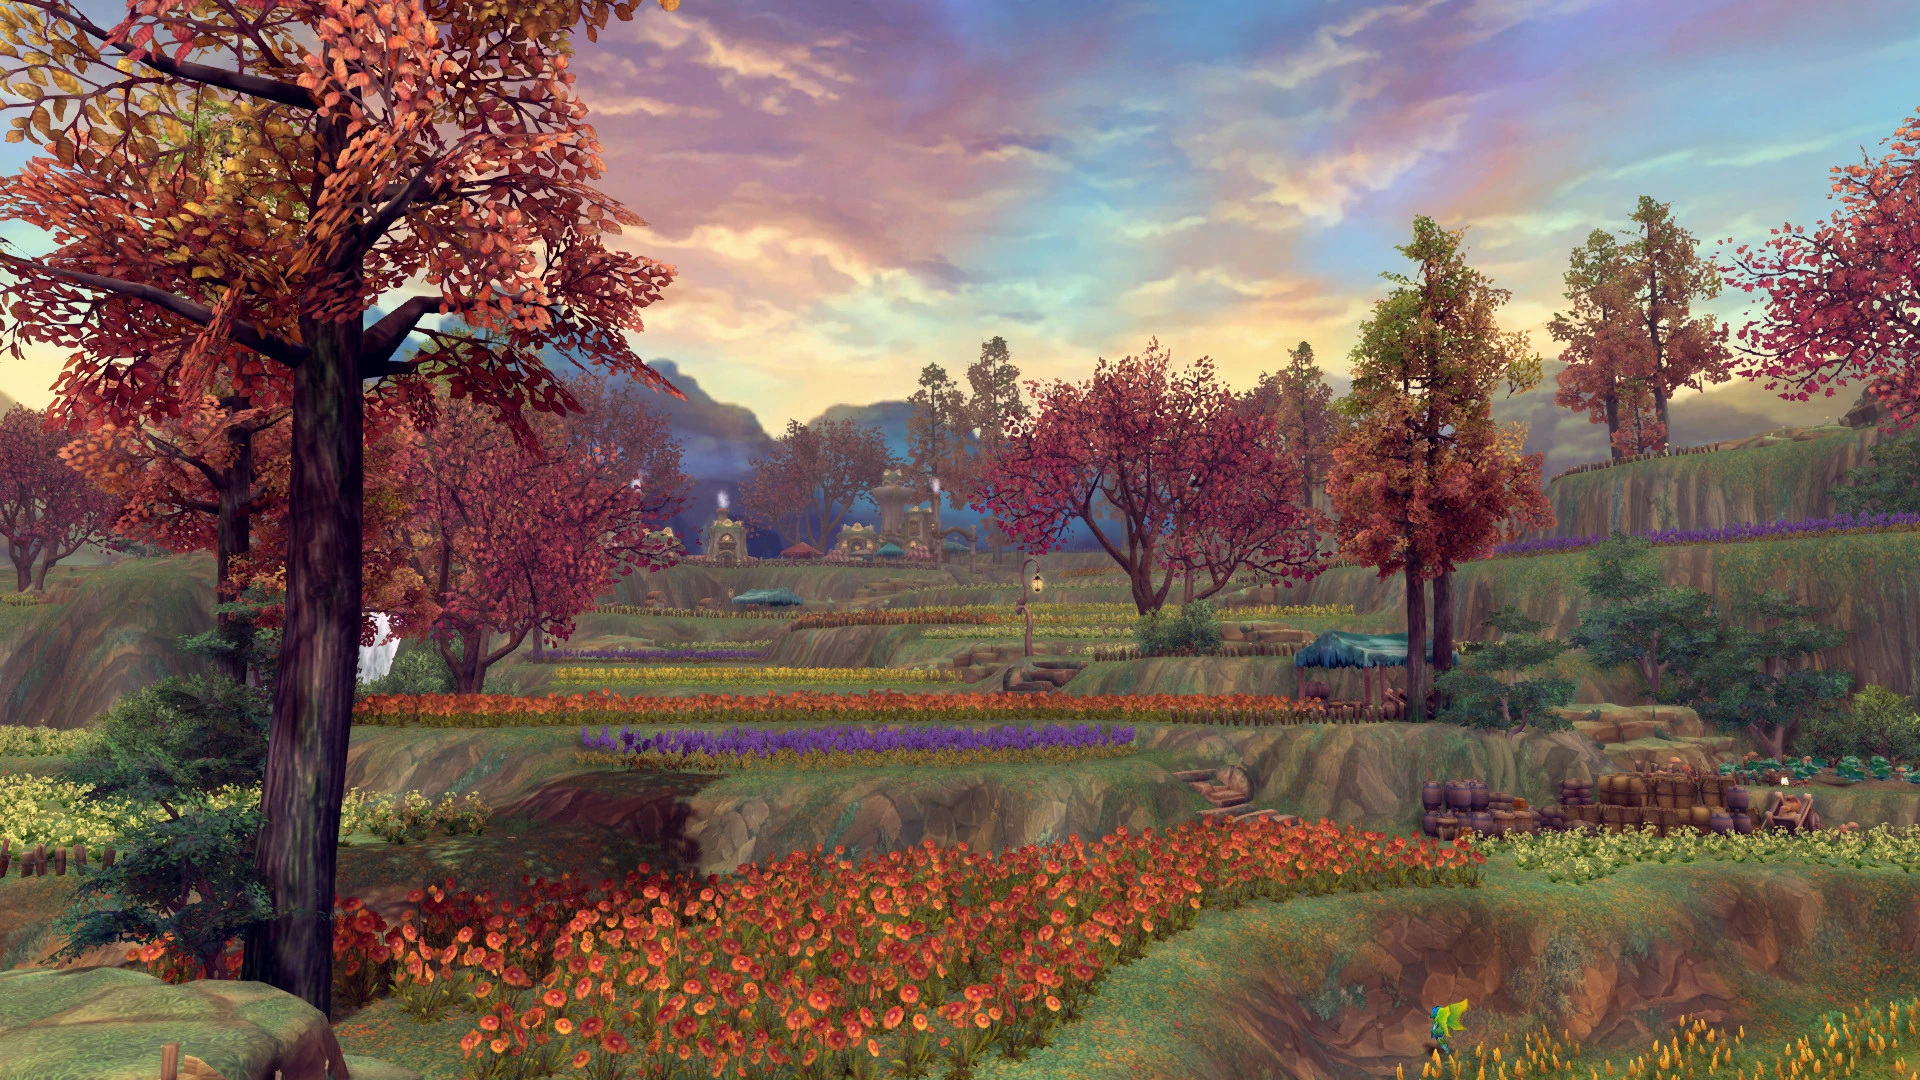
| + | [[File:Crescent Hill - Crescent Flower Field.jpg|thumb|left|Crescent Flower Field]] |
||
| + | Crescent Flower Field, located south of Lunarin, is a vast field of flowers. It is swarming with sprites. With the ceremonial vessels stolen from the people of Lunarin, the imbalance of power causes the flowers to morph into physical beings, the Flowertraps. |
||
| + | |||
| + | The entrance to the former village of Lunarin is found nearby. |
||
| + | {{clr}} |
||
| + | ===Clark Farm=== |
||
| + | [[File:Crescent Hill - Clark Farm.jpg|thumb|Clark Farm]] |
||
| + | A farm situated in the center of Crescent Hill, Clark Farm produces many of the crops, dairy, and meat products for Lunarin. It is run by [[Clark]]. However, several beetles have swarmed outside of Clark Farm, stressing Clark into ridding the beetles to protect his farm. |
||
| + | {{clr}} |
||
| + | ===Mistwalker Tribe=== |
||
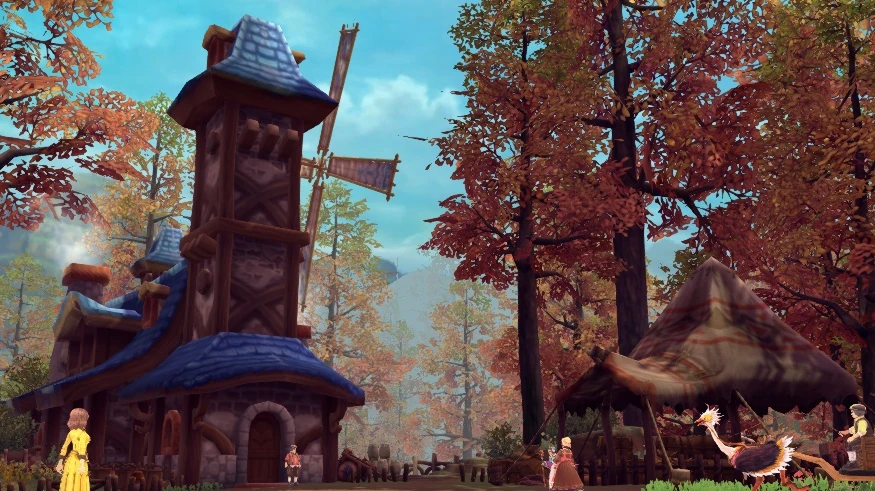
| + | [[File:Crescent Hill - Mistwalker Tribe.jpg|thumb|left|Mistwalker Tribe]] |
||
| + | The Mistwalker Tribe is home to the Mistwalker Gnomes, located south of Clark Farm. The Mistwalkers have stolen the ceremonial vessels and the ceremonial tome and have hidden them in the camp. |
||
| + | {{clr}} |
||
| + | ===Altar of the Moon=== |
||
| + | [[File:Crescent Hill - Altar of the Moon.jpg|thumb|Altar of the Moon]] |
||
| + | The Altar of the Moon, located west of Lunarin, is an altar containing a blue crystal, allowing several [[Eidolon]]s to appear from time to time. The people of Lunarin come to the altar to celebrate the Crescent Ceremony, in which they read the ceremonial tome and make their blessings towards the altar. |
||
| + | {{clr}} |
||
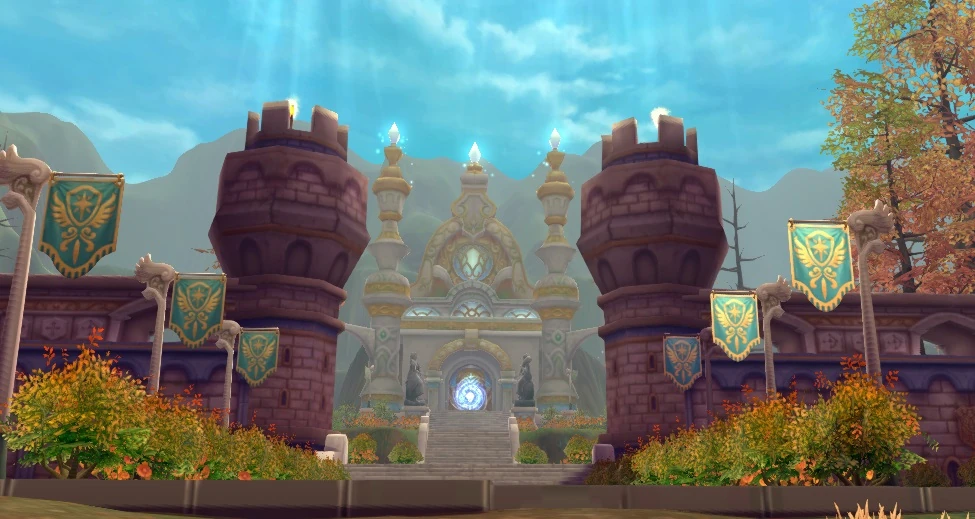
| + | ===Navea Outer District=== |
||
| + | [[File:Crescent Hill - Navea Outer District.jpg|thumb|left|Navea Outer District]] |
||
| + | The outer district of Navea is the gateway to the largest human city in Terra. Situated in the northwest of Crescent Hill, the area is subjected to large city walls that protect the city. Several birdbrains make their home near the water. Nearby is the entrance to [[Cactakara Forest]]. |
||
| + | |||
| + | The [[Temple of the Eidolons]] is located in the outer district, in which scientists have build a foundation to serve as the research facility for the summoning of the Eidolons. |
||
| + | {{clr}} |
||
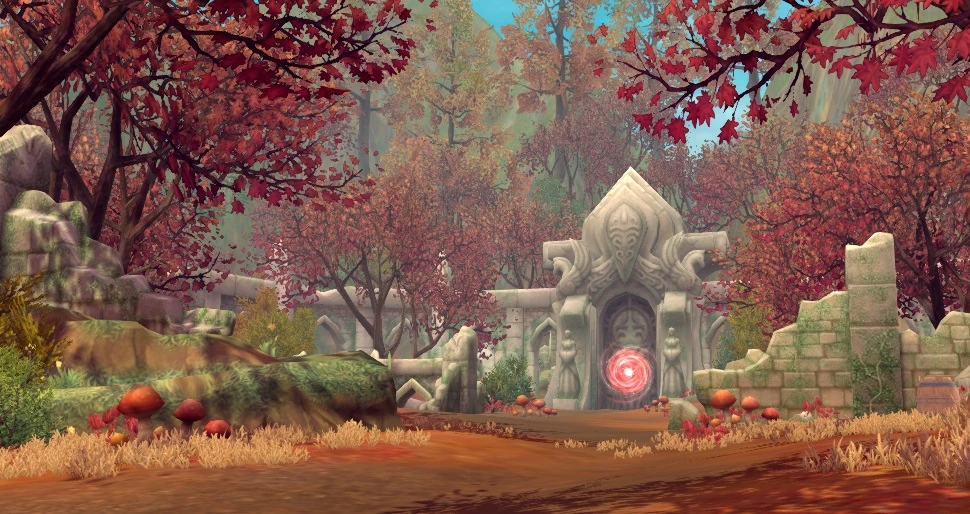
| + | ===Alabastren Temple Ruins=== |
||
| + | [[File:Crescent Hill - Alabastren Temple Ruins.jpg|thumb|Alabastren Temple Ruins]] |
||
| + | The ruins of Alabastren Temple is located north of Lunarin. In ancient times, the temple served as the area for the celebration of the Crescent Ceremony. However, it was later closed down by the Church and has been left in ruins. Within the temple lies an evil energy, which further explains the closure of the temple. Recently, the Makar and the Gnomes have patrolled the area, where the Makar prince has broken the seal to the temple in hopes of gaining the energy to defeat his brothers in battle. |
||
| + | {{clr}} |
||
===Dungeons=== |
===Dungeons=== |
||
| − | *[[Alabastren Temple]] |
+ | *[[Alabastren Temple]] |
*[[Former Site of Lunarin Village]] |
*[[Former Site of Lunarin Village]] |
||
*[[Temple of the Eidolons]] |
*[[Temple of the Eidolons]] |
||
| + | *[[Gaia's Sanctuary]] |
||
| − | |||
| + | *[[Lament of the Thunder Dragon King]] |
||
| − | ===Portals=== |
||
| − | *To [[Navea]] |
||
| − | *To [[Helonia Coast]] |
||
| − | *To [[Cactakara Forest]] |
||
==NPCs== |
==NPCs== |
||
| + | {{NPClisting |
||
| − | <tabber> |
||
| + | |'''Major''' |
||
| − | Main= |
||
| + | {{NPClist|[[Anthony]]|Old Craftsman|X:772, Y:352}} |
||
| − | {{NPClisting Tabletop}} |
||
| + | {{NPClist|[[Anya]]|Templar|X:434, Y:709}} |
||
| − | {{NPClisting Table|Aimee|<Missing Moonlight Rabbit>|X:490, Y:442; X:507, Y:463| -- }} |
||
| + | {{NPClist|[[Clark]]|Farm Elder|X:571, Y:364}} |
||
| − | {{NPClisting Table|Anthony|<Old Craftsman>|X:772, Y:352|Achievement: [[Wigging Out]]}} |
||
| − | {{ |
+ | {{NPClist|[[Halton]]|Young Man|X:791, Y:366}} |
| + | {{NPClist|[[Jessie]]||X:705, Y:140}} |
||
| − | {{NPClisting Table|Barthold|<Dimensional Mage>|X:732, Y:479| -- }} |
||
| + | {{NPClist|[[Nala]]|Woman|X:875, Y:366}} |
||
| − | {{NPClisting Table|Clark|<Farm Elder>|X:571, Y:364|Achievement: [[Out to Pasture]]}} |
||
| + | {{NPClist|[[Omar]]|Lunarin Chief|X:869, Y:361}} |
||
| − | {{NPClisting Table|Fame Quest|<Prestigious Quests>|X:710, Y:426| -- }} |
||
| − | {{ |
+ | {{NPClist|[[Paolo]]|Assistant Craftsman|X:706, Y:591}} |
| + | {{NPClist|[[Potter]]|Foreman|X:487, Y:209}} |
||
| − | {{NPClisting Table|Immanuel|<Moonlight Rabbit Elder>|X:535, Y:579| -- }} |
||
| + | {{NPClist|[[Rosie]]|Scholar|X:597, Y:386}} |
||
| − | {{NPClisting Table|Mirabelle|<Prestigious Quest Clerk>|X:712, Y:427| -- }} |
||
| + | {{NPClist|[[Sue]]|Maiden|X:768, Y:415}} |
||
| − | {{NPClisting Table|Nala|<Woman>|X:875, Y:366|Achievement: [[Aromatherapy]]}} |
||
| + | |'''Services''' |
||
| − | {{NPClisting Table|Omar|<Lunarin Chief>|X:869, Y:361| -- }} |
||
| + | {{NPClist|[[Albert]]|[[File:GuardNPCicon.png|link=]] Lunarin Village Guard|X:755, Y:340}} |
||
| − | {{NPClisting Table|Paolo|<Assistant Craftsman>|X:706, Y:591|Achievement: [[Something Out of Nothing]]}} |
||
| + | {{NPClist|[[Angie]]|[[File:MerchanctNPCicon.png|link=]] Traveling Merchant|X:587, Y:624}} |
||
| − | {{NPClisting Table|Potter|<Foreman>|X:487, Y:209| -- }} |
||
| + | {{NPClist|[[Ann]]|[[File:GrocerNPCicon.png|link=]] Lunarin Chef|X:786, Y:382}} |
||
| − | {{NPClisting Table|Rosie|<Scholar>|X:597, Y:386|Achievement: [[Ancient Message]]}} |
||
| + | {{NPClist|[[Atlas]]|[[File:MysticstoneNPCicon.png|link=]] Secret Stone Merchant|X:772, Y:374}} |
||
| − | {{NPClisting Table|Salvador|<Moonlight Rabbit Tribe>|X:535, Y:579| -- }} |
||
| + | {{NPClist|[[Bernie]]|[[File:WarehouseNPCicon.png|link=]] Warehouse Manager|X:785, Y:340}} |
||
| − | {{NPClisting Table|Shara|<Missing Moonlight Rabbit>|X:856, Y:298| -- }} |
||
| + | {{NPClist|[[Grayson]]|[[File:GrocerNPCicon.png|link=]] Grocer|X:787, Y:403}} |
||
| − | {{NPClisting Table|Sue|<Maiden>|X:768, Y:415|Achievement: [[Metamorphosis]]}} |
||
| + | {{NPClist|[[Linda]]|[[File:ArmorNPCicon.png|link=]] Armor Merchant|X:755, Y:354}} |
||
| − | {{NPClisting Table|Sully|<Prankster>|X:866, Y:331| -- }} |
||
| + | {{NPClist|[[Osman]]|[[File:MerchanctNPCicon.png|link=]] Weapon Merchant|X:766, Y:389}} |
||
| − | {{NPClisting Tableend}} |
||
| + | {{NPClist|[[Percy]]|[[File:GrocerNPCicon.png|link=]] Lunarin Peddler|X:790, Y:376}} |
||
| − | |-| |
||
| + | {{NPClist|[[Traveling Priest]]|[[File:Resurrectionpointicon.png|link=]] Priest|X:706, Y:416}} |
||
| − | Services= |
||
| + | |col=2 |
||
| − | {{NPClisting Tabletop}} |
||
| + | |'''Minor''' |
||
| − | {{NPClisting Table|Albert|[[File:GuardNPCicon.png|link=]] <Lunarin Village Guard>|X:755, Y:340| -- }} |
||
| + | {{NPClist|Aimee|Missing Moonlight Rabbit|X:490, Y:442; X:507, Y:463}} |
||
| − | {{NPClisting Table|Angie|[[File:MerchanctNPCicon.png|link=]] <Traveling Merchant>|X:587, Y:624| -- }} |
||
| + | {{NPClist|Arnold and Joanne||X:782, Y:428}} |
||
| − | {{NPClisting Table|Ann|[[File:GrocerNPCicon.png|link=]] <Lunarin Chef>|X:786, Y:382| -- }} |
||
| + | {{NPClist|Barthold|Dimensional Mage|X:732, Y:479}} |
||
| − | {{NPClisting Table|Atlas|[[File:MysticstoneNPCicon.png|link=]] <Secret Stone Merchant>|X:772, Y:374| -- }} |
||
| + | {{NPClist|Cass and Holly||X:763, Y:339}} |
||
| − | {{NPClisting Table|Bernie|[[File:WarehouseNPCicon.png|link=]] <Warehouse Manager>|X:785, Y:340| -- }} |
||
| + | {{NPClist|Eidolon Research Director||X:250, Y:545}} |
||
| − | {{NPClisting Table|Grayson|[[File:GrocerNPCicon.png|link=]] <Grocer>|X:787, Y:403| -- }} |
||
| + | {{NPClist|Fame Quest|Prestigious Quests|X:710, Y:426}} |
||
| − | {{NPClisting Table|Linda|[[File:ArmorNPCicon.png|link=]] <Armor Merchant>|X:755, Y:354| -- }} |
||
| + | {{NPClist|Farmer and Farm Child||X:596, Y:368}} |
||
| − | {{NPClisting Table|Osman|[[File:MerchanctNPCicon.png|link=]] <Weapon Merchant>|X:766, Y:389| -- }} |
||
| + | {{NPClist|Gency and Maddy||X:637, Y:207}} |
||
| − | {{NPClisting Table|Percy|[[File:GrocerNPCicon.png|link=]] <Lunarin Peddler>|X:790, Y:376| -- }} |
||
| + | {{NPClist|Immanuel|Moonlight Rabbit Elder|X:535, Y:579}} |
||
| − | {{NPClisting Table|Traveling Priest|[[File:Resurrectionpointicon.png|link=]] Priest|X:706, Y:416| -- }} |
||
| + | {{NPClist|Jimmy, Millia, and Teacher||X:739, Y:457}} |
||
| − | {{NPClisting Tableend}} |
||
| + | {{NPClist|Kevin and Stall Girl||X:711, Y:414}} |
||
| − | |-| |
||
| + | {{NPClist|McCain|Winemaker|X:725, Y:403}} |
||
| − | Miscellaneous= |
||
| + | {{NPClist|Mirabelle|Prestigious Quest Clerk|X:712, Y:427}} |
||
| − | {{NPClisting Tabletop}} |
||
| + | {{NPClist|Pike and Sophie||X:828, Y:373}} |
||
| − | {{NPClisting Table|Apprentice Rancher||X:851, Y:391|Achievement: [[How Now Brown Cow]]}} |
||
| + | {{NPClist|Poet and Village Elder||X:841, Y:332}} |
||
| − | {{NPClisting Table|Arnold||X:782, Y:428|Achievement: [[Ghost Story]]}} |
||
| + | {{NPClist|Rancher Foreman and Ranchers||X:851, Y:391}} |
||
| − | {{NPClisting Table|Cass||X:763, Y:339|Achievement: [[Young Love]]}} |
||
| − | {{ |
+ | {{NPClist|[[Romeo and Juliet]]||X:629, Y:091}} |
| + | {{NPClist|Salvador|Moonlight Rabbit Tribe|X:535, Y:579}} |
||
| − | {{NPClisting Table|Experienced Rancher||X:856, Y:391|Achievement: [[How Now Brown Cow]]}} |
||
| + | {{NPClist|Shara|Missing Moonlight Rabbit|X:856, Y:298}} |
||
| − | {{NPClisting Table|Farmer||X:596, Y:368|Achievement: [[Irresistibly Adorable]]}} |
||
| − | {{ |
+ | {{NPClist|Sully|Prankster|X:866, Y:331}} |
| + | {{NPClist|William||X:687, Y:105}} |
||
| − | {{NPClisting Table|Farm Child||X:596, Y:366|Achievement: [[Irresistibly Adorable]]}} |
||
| + | }} |
||
| − | {{NPClisting Table|Gency||X:637, Y:207|Achievement: [[Unusual Taste]]}} |
||
| − | {{NPClisting Table|Holly||X:761, Y:340|Achievement: [[Young Love]]}} |
||
| − | {{NPClisting Table|Jessie||X:705, Y:140| -- }} |
||
| − | {{NPClisting Table|Jimmy||X:739, Y:457|Achievement: [[Early to Bed, Early to Rise]]}} |
||
| − | {{NPClisting Table|Joanne||X:781, Y:426|Achievement: [[Ghost Story]]}} |
||
| − | {{NPClisting Table|Juliet||X:629, Y:091|Achievement: [[Rose By Any Other Name]]}} |
||
| − | {{NPClisting Table|Kevin||X:711, Y:414|Achievement: [[Hitting a Snag]]}} |
||
| − | {{NPClisting Table|Maddy||X:637, Y:208|Achievement: [[Unusual Taste]]}} |
||
| − | {{NPClisting Table|McCain|<Winemaker>|X:725, Y:403|Achievement: [[Sweet Nectar]]}} |
||
| − | {{NPClisting Table|Millia||X:739, Y:458|Achievement: [[Early to Bed, Early to Rise]]}} |
||
| − | {{NPClisting Table|Pike||X:828, Y:373|Achievement: [[A Kind Heart]]}} |
||
| − | {{NPClisting Table|Poet||X:841, Y:332|Achievement: [[Flower Anonymous]]}} |
||
| − | {{NPClisting Table|Rancher Foreman||X:855, Y:388|Achievement: [[How Now Brown Cow]]}} |
||
| − | {{NPClisting Table|Romeo||X:628, Y:091|Achievement: [[Rose By Any Other Name]]}} |
||
| − | {{NPClisting Table|Sophie||X:829, Y:372|Achievement: [[A Kind Heart]]}} |
||
| − | {{NPClisting Table|Stall Girl||X:710, Y:409|Achievement: [[Hitting a Snag]]}} |
||
| − | {{NPClisting Table|Teacher||X:740, Y:458|Achievement: [[Early to Bed, Early to Rise]]}} |
||
| − | {{NPClisting Table|Village Elder||X:840, Y:332| -- }} |
||
| − | {{NPClisting Table|Young Rancher||X:848, Y:397|Achievement: [[How Now Brown Cow]]}} |
||
| − | {{NPClisting Tableend}} |
||
| − | </tabber> |
||
| + | ==Merchants== |
||
| − | ==Merchant vendors== |
||
<tabber> |
<tabber> |
||
Weapon Merchant= |
Weapon Merchant= |
||
| Line 119: | Line 131: | ||
{{Service|Pioneer's Tome||192|image=Grimoire15.png}} |
{{Service|Pioneer's Tome||192|image=Grimoire15.png}} |
||
{{Service|Green Leaves Harp||170|image=Harp15.png}} |
{{Service|Green Leaves Harp||170|image=Harp15.png}} |
||
| + | {{Service|Katars of the Hunter||203|image=Katar15.png}} |
||
| + | {{Service|Forest Ranger's Bow||233|image=Bow15.png}} |
||
| + | {{Service|Samurai Tachi||249|image=Tachi15.png}} |
||
| + | {{Service|Dementor Scythe||207|image=Scythe15.png}} |
||
| + | {{Service|Heavy Guard Sword||271|image=Holysword15.png}} |
||
{{Service|Iron Blades||437|image=Dualblade25.png}} |
{{Service|Iron Blades||437|image=Dualblade25.png}} |
||
{{Service|Beast Sword and Shield||486|image=Swordshield25.png}} |
{{Service|Beast Sword and Shield||486|image=Swordshield25.png}} |
||
| Line 127: | Line 144: | ||
{{Service|Codex of Emerald Oak||413|image=Grimoire25.png}} |
{{Service|Codex of Emerald Oak||413|image=Grimoire25.png}} |
||
{{Service|Bronze Harp||365|image=Harp25.png}} |
{{Service|Bronze Harp||365|image=Harp25.png}} |
||
| + | {{Service|Guardian's Katars||437|image=Katar25.png}} |
||
| + | {{Service|Strong Iron Longbow||501|image=Bow25.png}} |
||
| + | {{Service|Beast Bone Tachi||535|image=Tachi25.png}} |
||
| + | {{Service|Shadow Scythe||446|image=Scythe25.png}} |
||
| + | {{Service|Steel Sword||583|image=Holysword25.png}} |
||
}} |
}} |
||
|-| |
|-| |
||
| Line 132: | Line 154: | ||
{{Service Table|image=Service_armor_merchant.png |
{{Service Table|image=Service_armor_merchant.png |
||
|Armor Merchant|Linda |
|Armor Merchant|Linda |
||
| − | |{{Service| |
+ | |{{Service|Bestial Headgear||147|image=Head-w5.jpg}} |
| − | {{Service| |
+ | {{Service|Bestial Light Armor||181|image=Body-w5.jpg}} |
| − | {{Service| |
+ | {{Service|Bestial Gauntlets||124|image=Hand-w5.jpg}} |
| − | {{Service| |
+ | {{Service|Bestial Boots||124|image=Feet-w5.jpg}} |
| − | {{Service| |
+ | {{Service|Bestial Waist Armor||113|image=Waist-w5.jpg}} |
| − | {{Service|Blue Light Soft Cap||147}} |
+ | {{Service|Blue Light Soft Cap||147|image=Head-w6.jpg}} |
| − | {{Service|Blue Light Coat||181}} |
+ | {{Service|Blue Light Coat||181|image=Body-w6.jpg}} |
| − | {{Service|Blue Light Gloves||124}} |
+ | {{Service|Blue Light Gloves||124|image=Hand-w6.jpg}} |
| − | {{Service|Blue Light Long-Boots||124}} |
+ | {{Service|Blue Light Long-Boots||124|image=Feet-w6.jpg}} |
| − | {{Service|Blue Light Sash||113}} |
+ | {{Service|Blue Light Sash||113|image=Waist-w6.jpg}} |
| − | {{Service|Bonesplinter Headgear||316}} |
+ | {{Service|Bonesplinter Headgear||316|image=Head-w7.jpg}} |
| − | {{Service|Bonesplinter Chest Armor||389}} |
+ | {{Service|Bonesplinter Chest Armor||389|image=Body-w7.jpg}} |
| − | {{Service|Bonesplinter Arm Armor||267}} |
+ | {{Service|Bonesplinter Arm Armor||267|image=Hand-w7.jpg}} |
| − | {{Service|Bonesplinter Battle Boots||267}} |
+ | {{Service|Bonesplinter Battle Boots||267|image=Feet-w7.jpg}} |
| − | {{Service|Bonesplinter Belt||243}} |
+ | {{Service|Bonesplinter Belt||243|image=Waist-w7.jpg}} |
| − | {{Service|Bonesplinter Necklace||340}} |
+ | {{Service|Bonesplinter Necklace||340|image=Necklace-w7.jpg}} |
| − | {{Service|Bonesplinter Ring||340}} |
+ | {{Service|Bonesplinter Ring||340|image=Ring-w7.jpg}} |
| − | {{Service|Earthshaker Headband||316}} |
+ | {{Service|Earthshaker Headband||316|image=Head-w8.jpg}} |
| − | {{Service|Earthshaker Robe||389}} |
+ | {{Service|Earthshaker Robe||389|image=Body-w8.jpg}} |
| − | {{Service|Earthshaker Gauntlets||267}} |
+ | {{Service|Earthshaker Gauntlets||267|image=Hand-w8.jpg}} |
| − | {{Service|Earthshaker Leggings||267}} |
+ | {{Service|Earthshaker Leggings||267|image=Feet-w8.jpg}} |
| − | {{Service|Earthshaker Belt||243}} |
+ | {{Service|Earthshaker Belt||243|image=Waist-w8.jpg}} |
| − | {{Service|Earthshaker |
+ | {{Service|Earthshaker Necklace||340|image=Necklace-w8.jpg}} |
| − | {{Service|Earthshaker Ring||340}} |
+ | {{Service|Earthshaker Ring||340|image=Ring-w8.jpg}} |
}} |
}} |
||
|-| |
|-| |
||
| Line 163: | Line 185: | ||
|{{Service|Medium HP Potion||15|image=Medium-HP-potion.jpg}} |
|{{Service|Medium HP Potion||15|image=Medium-HP-potion.jpg}} |
||
{{Service|Large HP Potion||32|image=Large-HP-Potion.jpg}} |
{{Service|Large HP Potion||32|image=Large-HP-Potion.jpg}} |
||
| − | {{Service|Pickaxe|1|500}} |
+ | {{Service|Pickaxe|1|500|image=Pickaxe.png}} |
| − | {{Service|Devout Acolyte (M)||41}} |
+ | {{Service|Devout Acolyte (M)||41|image=Costume-devoutacolytemale.png}} |
| − | {{Service|Devout Acolyte (F)||41}} |
+ | {{Service|Devout Acolyte (F)||41|image=Costume-devoutacolytefemale.png}} |
| − | {{Service|Engineer's Uniform (M)||41}} |
+ | {{Service|Engineer's Uniform (M)||41|image=Costume-engineeruniformmale.png}} |
| − | {{Service|Engineer's Uniform (F)||41}} |
+ | {{Service|Engineer's Uniform (F)||41|image=Costume-engineeruniformfemale.png}} |
| − | {{Service|Adventurer's Suit (M)||41}} |
+ | {{Service|Adventurer's Suit (M)||41|image=Costume-adventurersuitmale.png}} |
| − | {{Service|Adventurer's Suit (F)||41}} |
+ | {{Service|Adventurer's Suit (F)||41|image=Costume-adventurersuitfemale.png}} |
| − | {{Service|Shadowcraft Badge|1|42}} |
+ | {{Service|Shadowcraft Badge|1|42|image=Shadowcraftbadge.jpg}} |
| − | {{Service|Whistle of Defense|1|158}} |
+ | {{Service|Whistle of Defense|1|158|image=Whistleofdefense.jpg}} |
| − | {{Service|Rock of the Great Land|1|447}} |
+ | {{Service|Rock of the Great Land|1|447|image=Rockofgreatland.jpg}} |
| − | {{Service|Bottled Magic Power|1|215}} |
+ | {{Service|Bottled Magic Power|1|215|image=Bottledmagicpower.jpg}} |
| − | {{Service|Bullet of Concentration||926}} |
+ | {{Service|Bullet of Concentration||926|image=Bulletofconcentration.jpg}} |
| − | {{Service|Firepower Circuit|1|331}} |
+ | {{Service|Firepower Circuit|1|331|image=Firepowercircuit.jpg}} |
| − | {{Service|Murmuring Holy Water||984}} |
+ | {{Service|Murmuring Holy Water||984|image=Murmuringholywater.jpg}} |
| − | {{Service|Note of Rhapsody||868}} |
+ | {{Service|Note of Rhapsody||868|image=Noteofrhapsody.jpg}} |
| + | {{Service|Deft Spirit|1|42|image=Deftspirit.jpg}} |
||
| + | {{Service|Essence of Speed|1|42|image=Essenceofspeed.jpg}} |
||
| + | {{Service|Crystalline Will|1|273|image=Crystallinewill.jpg}} |
||
| + | {{Service|Demon Fang|1|181|image=Demonfang.jpg}} |
||
| + | {{Service|Holy Crystal|1|181|image=Holycrystal.jpg}} |
||
}} |
}} |
||
|-| |
|-| |
||
Secret Stone Merchant= |
Secret Stone Merchant= |
||
| − | {{Service Table|image= |
+ | {{Service Table|image=Service_grocer.png |
|Secret Stone Merchant|Atlas |
|Secret Stone Merchant|Atlas |
||
| − | |{{Service|Cardinal Sword Slash Secret Stone||168}} |
+ | |{{Service|Cardinal Sword Slash Secret Stone||168|image=Cardinalsecretstone.png}} |
| − | {{Service|Cardinal Raging Slash Secret Stone||168}} |
+ | {{Service|Cardinal Raging Slash Secret Stone||168|image=Cardinalsecretstone.png}} |
| − | {{Service|Cardinal Fireball Secret Stone||168}} |
+ | {{Service|Cardinal Fireball Secret Stone||168|image=Cardinalsecretstone.png}} |
| − | {{Service|Cardinal Storm Curse Secret Stone||168}} |
+ | {{Service|Cardinal Storm Curse Secret Stone||168|image=Cardinalsecretstone.png}} |
| − | {{Service|Cardinal Slash Cut Secret Stone||168}} |
+ | {{Service|Cardinal Slash Cut Secret Stone||168|image=Cardinalsecretstone.png}} |
| − | {{Service|Cardinal Aimed Shot Secret Stone||168}} |
+ | {{Service|Cardinal Aimed Shot Secret Stone||168|image=Cardinalsecretstone.png}} |
| − | {{Service|Cardinal Shadow Bolt Secret Stone||168}} |
+ | {{Service|Cardinal Shadow Bolt Secret Stone||168|image=Cardinalsecretstone.png}} |
| − | {{Service|Cardinal Cannon Salvo Secret Stone||168}} |
+ | {{Service|Cardinal Cannon Salvo Secret Stone||168|image=Cardinalsecretstone.png}} |
| + | {{Service|Cardinal Swift Strike Secret Stone||168|image=Cardinalsecretstone.png}} |
||
| + | {{Service|Cardinal Triple Shot Secret Stone||168|image=Cardinalsecretstone.png}} |
||
| + | {{Service|Cardinal Soaring Flash Secret Stone||168|image=Cardinalsecretstone.png}} |
||
| + | {{Service|Cardinal Shadowbolt Barrage Secret Stone||168|image=Cardinalsecretstone.png}} |
||
| + | {{Service|Charming Hostile Secret Stone Ground Slasher||168|image=Cardinalsecretstone.png}} |
||
}} |
}} |
||
|-| |
|-| |
||
| − | + | Chef= |
|
{{Service Table|image=Service_grocer.png |
{{Service Table|image=Service_grocer.png |
||
|Lunarin Chef|Ann |
|Lunarin Chef|Ann |
||
| Line 199: | Line 231: | ||
{{Service|Food/Vegetables in White Sauce||165|image=Vegetablesinwhitesauce.png}} |
{{Service|Food/Vegetables in White Sauce||165|image=Vegetablesinwhitesauce.png}} |
||
{{Service|Food/Flower Biscuit||135|image=Flowerbiscuit.png}} |
{{Service|Food/Flower Biscuit||135|image=Flowerbiscuit.png}} |
||
| + | }} |
||
| + | ===Cooking Tools=== |
||
| + | {{Service Table|image=Service_grocer.png |
||
| + | |Lunarin Chef|Ann |
||
| + | |{{Service|Copper Skillet|1||image=}} |
||
| + | {{Service|Steel Chef's Knife|1||image=}} |
||
| + | {{Service|Obsidian Kitchen Set|1||image=}} |
||
}} |
}} |
||
|-| |
|-| |
||
| − | + | Peddler= |
|
{{Service Table|image=Service_grocer.png |
{{Service Table|image=Service_grocer.png |
||
|Lunarin Peddler|Percy |
|Lunarin Peddler|Percy |
||
| Line 207: | Line 246: | ||
{{Service|Drink/Crescent Flower Herbal Tea||150|image=Herbaltea.png}} |
{{Service|Drink/Crescent Flower Herbal Tea||150|image=Herbaltea.png}} |
||
{{Service|Drink/Mature Black Tea||135|image=Matureblacktea.png}} |
{{Service|Drink/Mature Black Tea||135|image=Matureblacktea.png}} |
||
| + | }} |
||
| + | ===Cooking Tools=== |
||
| + | {{Service Table|image=Service_grocer.png |
||
| + | |Lunarin Peddler|Percy |
||
| + | |{{Service|Copper Skillet|1||image=}} |
||
| + | {{Service|Steel Chef's Knife|1||image=}} |
||
| + | {{Service|Obsidian Kitchen Set|1||image=}} |
||
}} |
}} |
||
|-| |
|-| |
||
| Line 214: | Line 260: | ||
|{{Service|Medium HP Potion||15|image=Medium-HP-potion.jpg}} |
|{{Service|Medium HP Potion||15|image=Medium-HP-potion.jpg}} |
||
{{Service|Large HP Potion||32|image=Large-HP-Potion.jpg}} |
{{Service|Large HP Potion||32|image=Large-HP-Potion.jpg}} |
||
| − | {{Service|Pickaxe|1|500}} |
+ | {{Service|Pickaxe|1|500|image=Pickaxe.png}} |
| − | {{Service|Duke of Darkness' Soul Box|2|500}} |
+ | {{Service|Duke of Darkness' Soul Box|2|500|image=Soulbox.png}} |
| − | {{Service|Empress of Torment's Soul Box|2|500}} |
+ | {{Service|Empress of Torment's Soul Box|2|500|image=Soulbox.png}} |
| − | {{Service|Emerald Tempest's Soul Box|2|500}} |
+ | {{Service|Emerald Tempest's Soul Box|2|500|image=Soulbox.png}} |
| − | {{Service|Trampling Thunder's Soul Box|2|500}} |
+ | {{Service|Trampling Thunder's Soul Box|2|500|image=Soulbox.png}} |
| − | {{Service|Feline Emperor's Soul Box|2|500}} |
+ | {{Service|Feline Emperor's Soul Box|2|500|image=Soulbox.png}} |
| − | {{Service| |
+ | {{Service|Eternal Youth's Toy Box|2|500|image=Gift-chest12.png}} |
| − | {{Service| |
+ | {{Service|Cheery Sylph's Jewelry Box|2|500|image=Gift-chest12.png}} |
| − | {{Service| |
+ | {{Service|Daring Dragon's Trease Cache|2|500|image=Gift-chest12.png}} |
| − | {{Service| |
+ | {{Service|Regal Unicorn's Royal Treasure|2|500|image=Gift-chest12.png}} |
| − | {{Service| |
+ | {{Service|Shadowcraft Badge|1|42|image=Shadowcraftbadge.jpg}} |
| − | {{Service| |
+ | {{Service|Whistle of Defense|1|158|image=Whistleofdefense.jpg}} |
| − | {{Service| |
+ | {{Service|Rock of the Great Land|1|447|image=Rockofgreatland.jpg}} |
| − | {{Service| |
+ | {{Service|Bottled Magic Power|1|215|image=Bottledmagicpower.jpg}} |
| + | {{Service|Bullet of Concentration||926|image=Bulletofconcentration.jpg}} |
||
| + | {{Service|Firepower Circuit|1|331|image=Firepowercircuit.jpg}} |
||
| + | {{Service|Murmuring Holy Water||984|image=Murmuringholywater.jpg}} |
||
| + | {{Service|Note of Rhapsody||868|image=Noteofrhapsody.jpg}} |
||
| + | {{Service|Deft Spirit|1|42|image=Deftspirit.jpg}} |
||
| + | {{Service|Essence of Speed|1|42|image=Essenceofspeed.jpg}} |
||
| + | {{Service|Crystalline Will|1|273|image=Crystallinewill.jpg}} |
||
| + | {{Service|Demon Fang|1|181|image=demonfang.jpg}} |
||
| + | {{Service|Holy Crystal|1|181|image=holycrystal.jpg}} |
||
{{Service|Iron Blades||437|image=Dualblade25.png}} |
{{Service|Iron Blades||437|image=Dualblade25.png}} |
||
{{Service|Beast Sword and Shield||486|image=Swordshield25.png}} |
{{Service|Beast Sword and Shield||486|image=Swordshield25.png}} |
||
| Line 236: | Line 291: | ||
{{Service|Codex of Emerald Oak||413|image=Grimoire25.png}} |
{{Service|Codex of Emerald Oak||413|image=Grimoire25.png}} |
||
{{Service|Bronze Harp||365|image=Harp25.png}} |
{{Service|Bronze Harp||365|image=Harp25.png}} |
||
| + | {{Service|Guardian's Katars||437|image=Katar25.png}} |
||
| + | {{Service|Strong Iron Longbow||501|image=Bow25.png}} |
||
| + | {{Service|Beast Bone Tachi||535|image=Tachi25.png}} |
||
| + | |||
| + | {{Service|Sculptured Greatsword||583|image=Holysword3.png}} |
||
| + | {{Service|Bone Shredder||525|image=Shuriken25.png}} |
||
| + | }} |
||
| + | |-| |
||
| + | Anglers Anonymous Merchant= |
||
| + | {{Service Table|image=Service_grocer.png |
||
| + | |Anglers Anonymous Merchant|Bennin |
||
| + | |{{Service|Legendary Fishing Bait Fortune Bag|||50|Token.png}} |
||
| + | {{Service|Ceremonial Fishing Rod|||250|Token.png}} |
||
| + | {{Service|Ceremonial Fishing Hat|||150|Token.png}} |
||
| + | {{Service|Ceremonial Raincoat|||150|Token.png}} |
||
| + | {{Service|Ceremonial Bracers|||150|Token.png}} |
||
| + | {{Service|Ceremonial Sandals|||150|Token.png}} |
||
| + | |notes=All fishing merchants sell the same standard equipment and bait. See [[Fishing#Equipment and bait]] |
||
}} |
}} |
||
</tabber> |
</tabber> |
||
==Monsters== |
==Monsters== |
||
| + | {{Monsterlisting|Birdbrain|21|Passive|X:667, Y:520}} |
||
| − | <tabber> |
||
| + | {{Monsterlisting|Colorful Birdbrain|21|Passive|X:647, Y:571}} |
||
| − | Crescent Hill= |
||
| − | {{Monsterlisting| |
+ | {{Monsterlisting|Lunar Flower Dryad|21|Hostile|X:667, Y:387}} |
| − | {{Monsterlisting| |
+ | {{Monsterlisting|Bayin|21|Passive|X:649, Y:408|type=Elite|title=Alluring Fragrance}} |
| − | {{Monsterlisting| |
+ | {{Monsterlisting|Crescent Sprite|22|Passive|X:714, Y:198}} |
| − | {{Monsterlisting| |
+ | {{Monsterlisting|Drunken Flower Beetle|22|Hostile|X:696, Y:258}} |
| − | {{Monsterlisting| |
+ | {{Monsterlisting|Flower Field Sprite|22|Passive|X:655, Y:129}} |
| − | {{Monsterlisting| |
+ | {{Monsterlisting|Evil Flowertrap|23|Hostile|X:828, Y:177}} |
| − | {{Monsterlisting| |
+ | {{Monsterlisting|Giant Flowertrap|23|Hostile|X:758, Y:126}} |
| − | {{Monsterlisting| |
+ | {{Monsterlisting|Doniland|23|Hostile|X:767, Y:114|type=Elite|title=The Glutton}} |
| − | {{Monsterlisting| |
+ | {{Monsterlisting|Tribal Patrolman|24|Hostile|X:401, Y:258}} |
| − | {{Monsterlisting| |
+ | {{Monsterlisting|Steambot|25|Hostile|X:512, Y:156}} |
| − | {{Monsterlisting|Tribal |
+ | {{Monsterlisting|Tribal Elder|25|Passive|X:453, Y:135}} |
| − | {{Monsterlisting| |
+ | {{Monsterlisting|Tribal Warrior|25|Hostile|X:401, Y:186}} |
| − | {{Monsterlisting| |
+ | {{Monsterlisting|Rondel|25|Hostile|X:528, Y:104|type=Boss|title=Grand Mistwalker Elder |
| + | |note=Related quest:}} |
||
| − | {{Monsterlisting|Tribal Warrior|25|Red| -- }} |
||
| − | {{Monsterlisting| |
+ | {{Monsterlisting|Grassy Beetle|26|Hostile|X:550, Y:438}} |
| − | {{Monsterlisting| |
+ | {{Monsterlisting|Heliotrope Beetle|26|Hostile|X:541, Y:294}} |
| − | {{Monsterlisting| |
+ | {{Monsterlisting|Senka|26|Hostile|X:593, Y:445|type=Elite|title=Deadly Poison}} |
| − | {{Monsterlisting| |
+ | {{Monsterlisting|Altar Sprite|27|Passive|X:532, Y:532}} |
| − | {{Monsterlisting| |
+ | {{Monsterlisting|Forest Flowertrap|27|Hostile|X:527, Y:646}} |
| − | {{Monsterlisting| |
+ | {{Monsterlisting|Waterfront Sprite|27|Passive|X:565, Y:574}} |
| − | {{Monsterlisting| |
+ | {{Monsterlisting|Navea Birdbrain|28|Passive|X:427, Y:790}} |
| − | {{Monsterlisting| |
+ | {{Monsterlisting|Waterborne Birdbrain|28|Passive|X:506, Y:724}} |
| − | {{Monsterlisting| |
+ | {{Monsterlisting|Mistwalker Bandit|29|Hostile|X:740, Y:661}} |
| − | {{Monsterlisting| |
+ | {{Monsterlisting|Sealing Stone Golem|29|Hostile|X:734, Y:742}} |
| − | {{Monsterlisting| |
+ | {{Monsterlisting|White Stone Golem|29|Hostile|X:617, Y:691}} |
| − | {{Monsterlisting| |
+ | {{Monsterlisting|Mainframe Soldier|30|Hostile|X:790, Y:652}} |
| − | {{Monsterlisting| |
+ | {{Monsterlisting|Varis|29|Hostile|X:824, Y:732|type=Elite|title=Troll Berserker}} |
| − | {{Monsterlisting| |
+ | {{Monsterlisting|Mistwalker Engineer|30|Hostile|X:819, Y:694}} |
| − | {{Monsterlisting|Mistwalker |
+ | {{Monsterlisting|Mistwalker Invader|30|Hostile|X:749, Y:622}} |
| − | {{Monsterlisting| |
+ | {{Monsterlisting|Mysterious Provocateur|30|Hostile|X:872, Y:688}} |
| − | {{Monsterlisting| |
+ | {{Monsterlisting|Mistwalker Chief|30|Hostile|X:880, Y:597|type=Boss |
| + | |note=Related quest:}} |
||
| − | {{Monsterlisting|Mistwalker Chief|30|Red|X:880, Y:597|type=King}} |
||
| + | {{Monsterlisting|Mordecai|53|Hostile|X:523, Y:797|type=Boss|title=Hermit| |
||
| − | |-| |
||
| + | note=Mordecai is a World Boss that respawns every 4 hours on Sunday, starting at 00:00 (12 AM) EST.}} |
||
| − | Former Site of Lunarin Village= |
||
| + | |||
| − | {{Monsterlisting|Drunken Flower Beetle|22|Red| -- }} |
||
| + | ==Objects== |
||
| − | {{Monsterlisting|Jeznach|23|Red| -- |type=King|title=Drunken Predator}} |
||
| + | ===Items=== |
||
| − | |-| |
||
| + | |||
| − | Alabastren Temple (solo)= |
||
| + | ===School of Fish=== |
||
| − | {{Monsterlisting|Heavy Security Robot|29|Red| -- }} |
||
| + | {| |
||
| − | {{Monsterlisting|Mistwalker Patroller|29|Red| -- }} |
||
| + | |- style="vertical-align:top;" |
||
| − | {{Monsterlisting|Taluda|30|Red| -- |type=King|title=Tribal Chief}} |
||
| + | | |
||
| − | {{Monsterlisting|Makar Bandit|30|Red| -- }} |
||
| + | {{Map item start|icon=School_of_Fish_icon.png|title=School of Fish| |
||
| − | {{Monsterlisting|Makar Sorcerer|30|Red| -- }} |
||
| + | {{Map item|Small Shrimp|White|image=Fish-smallshrimp.png}} |
||
| − | {{Monsterlisting|Odum Ryan|31|Red| -- |type=King|title=Rebel Leader}} |
||
| + | {{Map item|Sweetfish|White|image=Fish-sweetfish.png}} |
||
| − | {{Monsterlisting|Bat|31|Red| -- }} |
||
| + | {{Map item|Catfish|Green|image=Fish-catfish.png}} |
||
| − | {{Monsterlisting|Shrine Guardian|31|Red| -- }} |
||
| + | {{Map item|Crystal Carp|Orange|image=Fish-longtailedbass.png}} |
||
| − | {{Monsterlisting|Cursed Sonjuno|32|Red| -- |type=King|title=Ancient Envoy of Gaia}} |
||
| + | {{Map item|Miracle Cube|Yellow|image=Miraclecube.png}} |
||
| − | </tabber> |
||
| + | }} |
||
| + | | |
||
| + | {{King Fish |
||
| + | |name=Golden Petal Fish |
||
| + | |title=Golden Blossom |
||
| + | |coordinates=X:462, Y:557 |
||
| + | |bait=Golden Petal |
||
| + | |spawn=Thursday at 1 AM<br/>Thursday at 9 AM<br/>Thursday at 5 PM |
||
| + | }} |
||
| + | |} |
||
==Quests== |
==Quests== |
||
| − | See [[:Category:Crescent Hill Quests|Crescent Hill Quests]] |
+ | See [[:Category:Crescent Hill Quests|Crescent Hill Quests]] |
| + | |||
| + | ===Achievements=== |
||
| + | {{Main|Crescent Hill/Achievements}} |
||
| + | |||
| + | ==Gallery== |
||
| + | <gallery> |
||
| + | Crescent Hill-loadingscreen.png|Loading screen |
||
| + | </gallery> |
||
| + | |||
==Navigation== |
==Navigation== |
||
{{Terra Locations}} |
{{Terra Locations}} |
||
| − | [[Category:Terra |
+ | [[Category:Terra]] |
Latest revision as of 11:28, 29 July 2017
Crescent Hill is a location in the world of Terra, located in South Midgard of Grazeus.
Background[]
Crescent Hill is blanketed by red maple leaves and fragrant flowers. The stunning beauty may have resulted in Crescent Hill as the birthplace of religions. The Lunarin village often prepares for a sacred ceremony of flowers.
The Crescent Ceremony is a festival held every year to honor the heroes who founded Lunarin. Formerly held in the Alabastren Temple before it was closed down, the ceremony takes place in the Altar of the Moon. In the Ritual of the Blessings, the residents sing their praises and ask them to look after the people for another year. A wooden structure is created for the ceremony, and people gather flowers from the flower fields. In the Altar of the Moon, the people use the ceremonial vessels that balances the energy of the forest. During the ritual, the people read from the ceremonial tome, a book of spells formerly belonging to the Church of Navea. However, in recent years, the people, specifically outsiders, have strayed from the tradition, thinking of the ceremony as more of a nuisance than a blessing.

The Crescent Ceremony, as it takes place in the Altar of the Moon
Recently, prior to the adventurer entering Crescent Hill, the ceremonial vessels, the tome, and the crescent gem were stolen from the people. It was later recovered in the Mistwalker Tribe area, a camp site for the Gnomes, and the gem from Odum Ryan, third prince of the Makars, in Alabastren Temple. The village chief, thankful for recovering the sacred items, rewards the Envoy of Gaia the key to the Starlight Treasure Chest. When the treasure chest was opened, an ancient, broken machinery was found and needed repairs from the dwarves in Cactakara Forest.
Campaign[]
- Main article: Crescent Hill/Campaign
Places of interests[]
Lunarin[]

Lunarin
Lunarin is a village located east of Crescent Hill. The village is run by the Lunarin Chief, Omar. Every year, the natives prepare for the Crescent Ceremony by gathering flowers from the nearby flower field and building a wooden structure.
Crescent Flower Field[]

Crescent Flower Field
Crescent Flower Field, located south of Lunarin, is a vast field of flowers. It is swarming with sprites. With the ceremonial vessels stolen from the people of Lunarin, the imbalance of power causes the flowers to morph into physical beings, the Flowertraps.
The entrance to the former village of Lunarin is found nearby.
Clark Farm[]

Clark Farm
A farm situated in the center of Crescent Hill, Clark Farm produces many of the crops, dairy, and meat products for Lunarin. It is run by Clark. However, several beetles have swarmed outside of Clark Farm, stressing Clark into ridding the beetles to protect his farm.
Mistwalker Tribe[]

Mistwalker Tribe
The Mistwalker Tribe is home to the Mistwalker Gnomes, located south of Clark Farm. The Mistwalkers have stolen the ceremonial vessels and the ceremonial tome and have hidden them in the camp.
Altar of the Moon[]


Altar of the Moon
The Altar of the Moon, located west of Lunarin, is an altar containing a blue crystal, allowing several Eidolons to appear from time to time. The people of Lunarin come to the altar to celebrate the Crescent Ceremony, in which they read the ceremonial tome and make their blessings towards the altar.
[]

Navea Outer District
The outer district of Navea is the gateway to the largest human city in Terra. Situated in the northwest of Crescent Hill, the area is subjected to large city walls that protect the city. Several birdbrains make their home near the water. Nearby is the entrance to Cactakara Forest.
The Temple of the Eidolons is located in the outer district, in which scientists have build a foundation to serve as the research facility for the summoning of the Eidolons.
Alabastren Temple Ruins[]

Alabastren Temple Ruins
The ruins of Alabastren Temple is located north of Lunarin. In ancient times, the temple served as the area for the celebration of the Crescent Ceremony. However, it was later closed down by the Church and has been left in ruins. Within the temple lies an evil energy, which further explains the closure of the temple. Recently, the Makar and the Gnomes have patrolled the area, where the Makar prince has broken the seal to the temple in hopes of gaining the energy to defeat his brothers in battle.
Dungeons[]
- Alabastren Temple
- Former Site of Lunarin Village
- Temple of the Eidolons
- Gaia's Sanctuary
- Lament of the Thunder Dragon King
NPCs[]
|
Major
|
Services
|
Minor
| |
Merchants[]
|
|
|
|
|
Cooking Tools[]
|
|
Cooking Tools[]
|
|
|
Monsters[]
Birdbrain |
Aggr | Coord | |
|---|---|---|---|
| 21 | Passive | X:667, Y:520 |
Colorful Birdbrain |
Aggr | Coord | |
|---|---|---|---|
| 21 | Passive | X:647, Y:571 |
Lunar Flower Dryad |
Aggr | Coord | |
|---|---|---|---|
| 21 | Hostile | X:667, Y:387 |
<Alluring Fragrance>
|
Aggr | Coord | |
|---|---|---|---|
| 21 | Passive | X:649, Y:408 |
Crescent Sprite |
Aggr | Coord | |
|---|---|---|---|
| 22 | Passive | X:714, Y:198 |
Drunken Flower Beetle |
Aggr | Coord | |
|---|---|---|---|
| 22 | Hostile | X:696, Y:258 |
Flower Field Sprite |
Aggr | Coord | |
|---|---|---|---|
| 22 | Passive | X:655, Y:129 |
Evil Flowertrap |
Aggr | Coord | |
|---|---|---|---|
| 23 | Hostile | X:828, Y:177 |
Giant Flowertrap |
Aggr | Coord | |
|---|---|---|---|
| 23 | Hostile | X:758, Y:126 |
<The Glutton>
|
Aggr | Coord | |
|---|---|---|---|
| 23 | Hostile | X:767, Y:114 |
Tribal Patrolman |
Aggr | Coord | |
|---|---|---|---|
| 24 | Hostile | X:401, Y:258 |
Steambot |
Aggr | Coord | |
|---|---|---|---|
| 25 | Hostile | X:512, Y:156 |
Tribal Elder |
Aggr | Coord | |
|---|---|---|---|
| 25 | Passive | X:453, Y:135 |
Tribal Warrior |
Aggr | Coord | |
|---|---|---|---|
| 25 | Hostile | X:401, Y:186 |
<Grand Mistwalker Elder>
|
Aggr | Coord | |
|---|---|---|---|
| 25 | Hostile | X:528, Y:104 | |
| Related quest: | |||
Grassy Beetle |
Aggr | Coord | |
|---|---|---|---|
| 26 | Hostile | X:550, Y:438 |
Heliotrope Beetle |
Aggr | Coord | |
|---|---|---|---|
| 26 | Hostile | X:541, Y:294 |
<Deadly Poison>
|
Aggr | Coord | |
|---|---|---|---|
| 26 | Hostile | X:593, Y:445 |
Altar Sprite |
Aggr | Coord | |
|---|---|---|---|
| 27 | Passive | X:532, Y:532 |
Forest Flowertrap |
Aggr | Coord | |
|---|---|---|---|
| 27 | Hostile | X:527, Y:646 |
Waterfront Sprite |
Aggr | Coord | |
|---|---|---|---|
| 27 | Passive | X:565, Y:574 |
Navea Birdbrain |
Aggr | Coord | |
|---|---|---|---|
| 28 | Passive | X:427, Y:790 |
Waterborne Birdbrain |
Aggr | Coord | |
|---|---|---|---|
| 28 | Passive | X:506, Y:724 |
Mistwalker Bandit |
Aggr | Coord | |
|---|---|---|---|
| 29 | Hostile | X:740, Y:661 |
Sealing Stone Golem |
Aggr | Coord | |
|---|---|---|---|
| 29 | Hostile | X:734, Y:742 |
White Stone Golem |
Aggr | Coord | |
|---|---|---|---|
| 29 | Hostile | X:617, Y:691 |
Mainframe Soldier |
Aggr | Coord | |
|---|---|---|---|
| 30 | Hostile | X:790, Y:652 |
<Troll Berserker>
|
Aggr | Coord | |
|---|---|---|---|
| 29 | Hostile | X:824, Y:732 |
Mistwalker Engineer |
Aggr | Coord | |
|---|---|---|---|
| 30 | Hostile | X:819, Y:694 |
Mistwalker Invader |
Aggr | Coord | |
|---|---|---|---|
| 30 | Hostile | X:749, Y:622 |
Mysterious Provocateur |
Aggr | Coord | |
|---|---|---|---|
| 30 | Hostile | X:872, Y:688 |
| Aggr | Coord | ||
|---|---|---|---|
| 30 | Hostile | X:880, Y:597 | |
| Related quest: | |||
<Hermit>
|
Aggr | Coord | |
|---|---|---|---|
| 53 | Hostile | X:523, Y:797 | |
| Mordecai is a World Boss that respawns every 4 hours on Sunday, starting at 00:00 (12 AM) EST. | |||
Objects[]
Items[]
School of Fish[]
|
| ||||||||||
Quests[]
Achievements[]
- Main article: Crescent Hill/Achievements
Gallery[]
")
[]
| South Midgard | Navea Port Skandia (1-10) • Helonia Coast (11-20) • Crescent Hill (20-30) • Cactakara Forest (30-40) Demarech Mines (40-45) • Triatio Highlands (45-50) • Candeo Marsh (45-50) • Ventos Prairie (50-55) |
|---|---|
| North Midgard | Oblitus Wood (50-55) • Star Sand Desert (50-55) • Vulture's Vale (60-65) • Blizzard Berg (60-65) Rainmist Reach (62-65) • Emerald Marsh (62-65) • Starstruck Plateau (66-70) • Silent Ice Field (66-70) Port Morton (70-75) • Candetonn Hill (70-75) |
| Principia | Viridian Steppe (75-80) • Desolate Valley (75-80) • Tanglevine Cascades (80-85) • Sunhunter's Vale (80-85) Chronology Forest (85-??) • Tempest Desert (85-??) |
| Misc. | Navea Cathedral • Guild Hall • Hidden Cabin • Thousand Water Marsh |