No edit summary Tag: rte-source |
|||
| (21 intermediate revisions by 5 users not shown) | |||
| Line 1: | Line 1: | ||
| ⚫ | |||
{{Infobox location |
{{Infobox location |
||
|image = Demarechmines.jpg |
|image = Demarechmines.jpg |
||
| + | |banner = Banner_Demarech_Mines.png |
||
| ⚫ | |||
| + | |caption = Stories tell that the Infinity Prism was found in these mines. This crystal can allegedly open a portal to the Aura Kingdom, the home of Angels. |
||
| ⚫ | |||
|level = 40-45 |
|level = 40-45 |
||
| + | |elite = • <Iron Beak> [[Arrel]]<br/>• <Duster> [[Gebast]]<br/>• <Life Creator> [[Yimis]]<br/>• <Cruel Blood> [[Galen]] |
||
| ⚫ | |||
| + | |portals = • [[Cactakara Forest]] |
||
| ⚫ | |||
| ⚫ | |||
| − | |bgm= |
||
| + | |setting = Mines |
||
| + | |inhabitants = Humans |
||
| ⚫ | |||
|dungeons =• [[Miner's Steppe]] |
|dungeons =• [[Miner's Steppe]] |
||
| ⚫ | |||
| ⚫ | |||
| + | |bgm=Field [[File:bgm006.ogg]] Tomitsa [[File:bgm006 1.ogg]]}} |
||
'''Demarech Mines''' is a location in the world of [[Terra]], located in South Midgard of [[Grazeus]]. |
'''Demarech Mines''' is a location in the world of [[Terra]], located in South Midgard of [[Grazeus]]. |
||
==Background== |
==Background== |
||
Stories say that the Infinity Prism was discovered in Demarech Mines. Supposedly, it would lead those to Aura Kingdom, the home of the Angels. |
Stories say that the Infinity Prism was discovered in Demarech Mines. Supposedly, it would lead those to Aura Kingdom, the home of the Angels. |
||
| + | |||
| + | ==Campaign== |
||
| + | {{Main|Demarech Mines/Campaign}} |
||
==Places of Interests== |
==Places of Interests== |
||
===Regions=== |
===Regions=== |
||
| − | + | ====Tomitsa==== |
|
| + | [[File:Demarech Mines - Tomitsa.jpg|thumb|left|Tomitsa]] |
||
| ⚫ | |||
| + | Tomitsa is a town in Demarech Mines, located in the southeastern region of Demarech Mines, just beyond the other side of the canyon. It is situated near the mountain side with flowing waterfalls. [[Mason]] is the town mayor of Tomitsa. Templar [[Victoria]] and her troops have stationed themselves in Tomitsa. |
||
| ⚫ | |||
| ⚫ | |||
| ⚫ | |||
| ⚫ | |||
| + | The entrance to [[Cactakara Forest]] is found near the village. |
||
| ⚫ | |||
| ⚫ | |||
| + | [[File:Demarech Mines - Pitmere Canyon.jpg|thumb|Pitmere Canyon]] |
||
| + | Pitmere Canyon, as its name states, is a canyon on the western part of Demarech Mines. Several scavenger birds, lions, and angler bugs are found throughout the region. |
||
| + | {{clr}} |
||
| ⚫ | |||
| + | [[File:Demarech Mines - Demarech Pool.jpg|thumb|left|Demarech Pool]] |
||
| + | Demarech Pool is located in the center area of Demarech Mines. It is stated to contain an incredible power within. The Shadow Knight used the pool to hide the energy, with the use of the Cube of Gaia. Now, the area is swarming with miracle rock golems and boulder sentries. On the east of Demarech Pool is another Blue Crystal, where several Eidolons appear. |
||
| + | {{clr}} |
||
| ⚫ | |||
| + | [[File:Demarech Mines - Caerment Altar.jpg|thumb|Caerment Altar]] |
||
| + | Caerment Altar is located in the eastern region. The area is surrounded by Guardian Golems and Keeper Golems. In recent history, the Shadow Knight re-encountered [[Hazel]], who has reminded her of the oath they have sworn prior to the event. This is also the place where Cube of Gaia was kept before Shadow Knight takes it away when Envoy travel through Hazel's memories. |
||
| + | |||
| + | This area serves as a fishing spot for ordinary fish. |
||
| + | {{clr}} |
||
| ⚫ | |||
| + | [[File:Demarech Mines - Demarech.jpg|thumb|left|Demarech]] |
||
| + | Demarech is the mining region on the northern part of Demarech Mines. The area is mainly made up of miracle crystals. But recent events has caused the miracle crystals to be mined in order to craft such materials to create a weapon only an Envoy of Gaia can wield. [[Harvey]] and Mason have escaped the grasp of the Shadow Knight and have situated near the mines. Harvey can forge Envoy's new equipment with the same quality as his apprentice, [[Analisa]] in this place. |
||
| + | |||
| + | This is also where the first-rated equipment ores are being mined that was often requested by Templar Knights. |
||
| + | {{clr}} |
||
| ⚫ | |||
| + | [[File:Demarech Mines - Marauders Camp.jpg|thumb|Marauder's Camp]] |
||
| + | The Marauder's Camp, located in the northeast region, is a campsite for the Shadow Knight. The Demon Army has set up the camp to store all the miracle crystals gathered from Demarech. The Marauder Captain, Solomon, is found deep inside the camp. |
||
| + | |||
| + | The entrance to [[Miner's Steppe]] is located within the camp. |
||
| + | {{clr}} |
||
===Dungeons=== |
===Dungeons=== |
||
*[[Miner's Steppe]] |
*[[Miner's Steppe]] |
||
| Line 30: | Line 63: | ||
==NPC== |
==NPC== |
||
| + | {{NPClisting |
||
| + | |'''Major''' |
||
| + | {{NPClist|[[Bobby]]|Young Man|X:234, Y:249}} |
||
| + | {{NPClist|[[Bonita]]|Maiden|X:626, Y:217}} |
||
| + | {{NPClist|[[Chelsea]]|Investigation Team Administrator|X:690, Y:153}} |
||
| + | {{NPClist|[[Floyd]]|Investigation Team Vice Leader|X618:, Y:535}} |
||
| + | {{NPClist|[[Geno]]|Church Investigator|X:609, Y:530}} |
||
| + | {{NPClist|[[Hamilton]]|Church Investigator|X:479, Y:621}} |
||
| + | {{NPClist|[[Harvey]]|Old Man <Blacksmith>|X:141, Y:597}} |
||
| + | {{NPClist|[[Hazel]]|Witch|X:612, Y:536}} |
||
| + | {{NPClist|[[Luther]]|Merchant|X:235, Y:249}} |
||
| + | {{NPClist|[[Mason]]|Mayor of Tomitsa|X:143, Y:590}} |
||
| + | {{NPClist|[[Nate]]|Church Investigator|X:147, Y:603}} |
||
| + | {{NPClist|[[Rebecca]]|Guide|X:245, Y:244}} |
||
| + | {{NPClist|[[Victoria]]|Investigation Team Leader|X:658, Y:187}} |
||
| + | |'''Services''' |
||
| + | {{NPClist|[[Casey]]|Traveling Merchant|X:386, Y:522}} |
||
| + | {{NPClist|[[Castro]]|Tomitsa Guard|X:634, Y:224}} |
||
| + | {{NPClist|[[Dwayne]]|Tomitsa Brewmeister|X:638, Y:141}} |
||
| + | {{NPClist|[[Joey]]|Armor Merchant|X:683, Y:217}} |
||
| + | {{NPClist|[[Johnny]]|Weapon Merchant|X:706, Y:211}} |
||
| + | {{NPClist|Harvey|Old Man <Blacksmith>|X:141, Y:597}} |
||
| + | {{NPClist|[[Matt]]|Secret Stone Merchant|X:668, Y:217}} |
||
| + | {{NPClist|[[Nilson]]|Banker|X:654, Y:188}} |
||
| + | {{NPClist|[[Nolan]]|Grocer|X:720, Y:197}} |
||
| + | {{NPClist|[[Randolph]]|Tomitsa Gourmet|X:656, Y:144}} |
||
| + | {{NPClist|[[Traveling Priest]]|Priest|X:559, Y:174}} |
||
| + | |col=2 |
||
| + | |'''Minor''' |
||
| + | {{NPClist|Bo Family||X:559, Y:135}} |
||
| + | {{NPClist|Claude||X:213, Y:578}} |
||
| + | {{NPClist|Crazy Doctor and Assistants||X:434, Y:516}} |
||
| + | {{NPClist|Edward||X:369, Y:517}} |
||
| + | {{NPClist|Fruit Seller and Traveler Kit||X:680, Y:150}} |
||
| + | {{NPClist|Harry|Street Rat|X:725, Y:214}} |
||
| + | {{NPClist|Jareth and Young Girl||X:609, Y:451}} |
||
| + | {{NPClist|Jessie's Follower and Kate's Follower||X:507, Y:091}} |
||
| + | {{NPClist|Lorent and Eve||X:720, Y:230}} |
||
| + | {{NPClist|[[Miles]]|Scholar|X:142, Y:602}} |
||
| + | {{NPClist|Miner||X:679, Y:131}} |
||
| + | {{NPClist|[[Mirabelle]]|Fame Quest Clerk|X:752, Y:236}} |
||
| + | {{NPClist|Old Villager||X:663, Y:127}} |
||
| + | {{NPClist|[[Romeo and Juliet]]||X:231, Y:781}} |
||
| + | {{NPClist|Village Elder||X:745, Y:201}} |
||
| + | {{NPClist|Rosalie and Viviane||X:440, Y:346}} |
||
| + | }} |
||
| + | ==Merchants== |
||
| − | ==Merchant vendors== |
||
<tabber> |
<tabber> |
||
Weapon Merchant= |
Weapon Merchant= |
||
| Line 172: | Line 251: | ||
==Monsters== |
==Monsters== |
||
| − | {{Monsterlisting|Arrel|41| |
+ | {{Monsterlisting|Arrel|41|Passive|X:483, Y:298|type=Elite|title=Iron Beak}} |
| − | {{Monsterlisting|Angler Bug|41| |
+ | {{Monsterlisting|Angler Bug|41|Passive|X:595, Y:335}} |
| − | {{Monsterlisting|Bloodthirsty Lion|41| |
+ | {{Monsterlisting|Bloodthirsty Lion|41|Hostile|X:357, Y:183}} |
| − | {{Monsterlisting|Cliff Lion|41| |
+ | {{Monsterlisting|Cliff Lion|41|Hostile|X:365, Y:234}} |
| − | {{Monsterlisting|Scavenger Bird|41| |
+ | {{Monsterlisting|Scavenger Bird|41|Hostile|X:477, Y:270}} |
| − | {{Monsterlisting|Gebast|42| |
+ | {{Monsterlisting|Gebast|42|Hostile|X:247, Y:419|type=Elite|title=Duster}} |
| − | {{Monsterlisting|Demarech Slimeling|42| |
+ | {{Monsterlisting|Demarech Slimeling|42|Hostile|X:612, Y:419}} |
| − | {{Monsterlisting|Hard-Shelled Angler Bug|42| |
+ | {{Monsterlisting|Hard-Shelled Angler Bug|42|Hostile|X:167, Y:208}} |
| − | {{Monsterlisting|Infected Scavenger Bird|42| |
+ | {{Monsterlisting|Infected Scavenger Bird|42|Hostile|X:170, Y:310}} |
| − | {{Monsterlisting|Leathery Angler Bug|42| |
+ | {{Monsterlisting|Leathery Angler Bug|42|Passive|X:236, Y:191}} |
| − | {{Monsterlisting|Raging Scavenger Bird|42| |
+ | {{Monsterlisting|Raging Scavenger Bird|42|Hostile|X:143, Y:267}} |
| − | {{Monsterlisting|Scavenger Bird King|42| |
+ | {{Monsterlisting|Scavenger Bird King|42|Hostile|X:206, Y:267|type=Boss}} |
| − | {{Monsterlisting|Slimeling|42| |
+ | {{Monsterlisting|Slimeling|42|Hostile|X:217, Y:397}} |
| − | {{Monsterlisting|Yimis|43| |
+ | {{Monsterlisting|Yimis|43|Passive|X:379, Y:417|type=Elite|title=Life Creator}} |
| − | {{Monsterlisting|Boulder Sentry|43| |
+ | {{Monsterlisting|Boulder Sentry|43|Hostile|X:379, Y:417}} |
| − | {{Monsterlisting|Guardian Golem|43| |
+ | {{Monsterlisting|Guardian Golem|43|Hostile|X:705, Y:484}} |
| − | {{Monsterlisting|Keeper Golem|43| |
+ | {{Monsterlisting|Keeper Golem|43|Hostile|X:804, Y:411}} |
| − | {{Monsterlisting|Miracle Rock Monster|43| |
+ | {{Monsterlisting|Miracle Rock Monster|43|Hostile|X:379, Y:417}} |
| − | {{Monsterlisting|Ruins Parasite|43| |
+ | {{Monsterlisting|Ruins Parasite|43|Hostile|X:346, Y:324}} |
| − | {{Monsterlisting|Demarech Mines Foreman|44| |
+ | {{Monsterlisting|Demarech Mines Foreman|44|Hostile|X:197, Y:794|type=Boss}} |
| − | {{Monsterlisting|Fierce Rock Beetle|44| |
+ | {{Monsterlisting|Fierce Rock Beetle|44|Hostile|X:261, Y:704}} |
| − | {{Monsterlisting|Marauder Miner|44| |
+ | {{Monsterlisting|Marauder Miner|44|Hostile|X:159, Y:760}} |
| − | {{Monsterlisting|Marauder Porter|44| |
+ | {{Monsterlisting|Marauder Porter|44|Hostile|X:225, Y:656}} |
| − | {{Monsterlisting|Miracle Rock Beetle|44| |
+ | {{Monsterlisting|Miracle Rock Beetle|44|Hostile|X:228, Y:754}} |
| − | {{Monsterlisting|Rock Beetle|44| |
+ | {{Monsterlisting|Rock Beetle|44|Hostile|X:230, Y:526}} |
| − | {{Monsterlisting|Galen|45| |
+ | {{Monsterlisting|Galen|45|Hostile|X:384, Y:605|type=Elite|title=Cruel Blood}} |
| − | {{Monsterlisting|Solomon|45| |
+ | {{Monsterlisting|Solomon|45|Hostile|X:741, Y:785|type=Boss|title=Marauder Captain}} |
| − | {{Monsterlisting|Camp Miner|45| |
+ | {{Monsterlisting|Camp Miner|45|Hostile|X:400, Y:718}} |
| − | {{Monsterlisting|Marauder Assassin|45| |
+ | {{Monsterlisting|Marauder Assassin|45|Hostile|X:675, Y:760}} |
| − | {{Monsterlisting|Marauder Lion Tamer|45| |
+ | {{Monsterlisting|Marauder Lion Tamer|45|Hostile|X:535, Y:712}} |
| − | {{Monsterlisting|Marauder Patrolman|45| |
+ | {{Monsterlisting|Marauder Patrolman|45|Hostile|X:488, Y:729}} |
| − | {{Monsterlisting|Stoneskin Lion|45| |
+ | {{Monsterlisting|Stoneskin Lion|45|Hostile|X:368, Y:583}} |
| − | {{Monsterlisting|Tamed Lion|45| |
+ | {{Monsterlisting|Tamed Lion|45|Hostile|X:535, Y:712}} |
| + | |||
| + | ==Objects== |
||
| + | ===Items=== |
||
| + | |||
| + | ===School of Fish=== |
||
| + | {| |
||
| + | |- style="vertical-align:top;" |
||
| + | | |
||
| + | {{Map item start|icon=School_of_Fish_icon.png|title=School of Fish| |
||
| + | {{Map item|Grass Carp|White|image=Fish-grasscarp.png}} |
||
| + | {{Map item|Herring|White|image=Fish-herring.png}} |
||
| + | {{Map item|Yellow Croaker|Green|image=Fish-flyingfish.png}} |
||
| + | {{Map item|Golden Lobster|Orange|image=Fish-goldenlobster.png}} |
||
| + | {{Map item|Miracle Cube|Yellow|image=Miraclecube.png}} |
||
| + | }} |
||
| + | | |
||
| + | {{King Fish |
||
| + | |name=Mutant Crystal Lobster |
||
| + | |title=Dark Crystal |
||
| + | |coordinates=X:740, Y:596 |
||
| + | |bait=Forked-Tail Loach |
||
| + | |spawn=Saturday at 1 AM<br/>Saturday at 9 AM<br/>Saturday at 5 PM |
||
| + | }} |
||
| + | |} |
||
==Quests== |
==Quests== |
||
| − | See [[:Category:Demarech Mines Quests|Demarech Mines Quests]] |
+ | See [[:Category:Demarech Mines Quests|Demarech Mines Quests]] |
| + | |||
| + | ===Achievements=== |
||
| + | {{Main|Demarech Mines/Achievements}} |
||
| + | |||
| + | ==Gallery== |
||
| + | <gallery> |
||
| + | snapshot_20150909_210653.jpg|A view of Demarech Mines from X: 742, Y:127 |
||
| + | </gallery> |
||
==Navigation== |
==Navigation== |
||
{{Terra Locations}} |
{{Terra Locations}} |
||
| − | [[Category:Terra |
+ | [[Category:Terra]] |
Latest revision as of 09:37, 19 March 2017
Demarech Mines is a location in the world of Terra, located in South Midgard of Grazeus.
Background[]
Stories say that the Infinity Prism was discovered in Demarech Mines. Supposedly, it would lead those to Aura Kingdom, the home of the Angels.
Campaign[]
- Main article: Demarech Mines/Campaign
Places of Interests[]
Regions[]
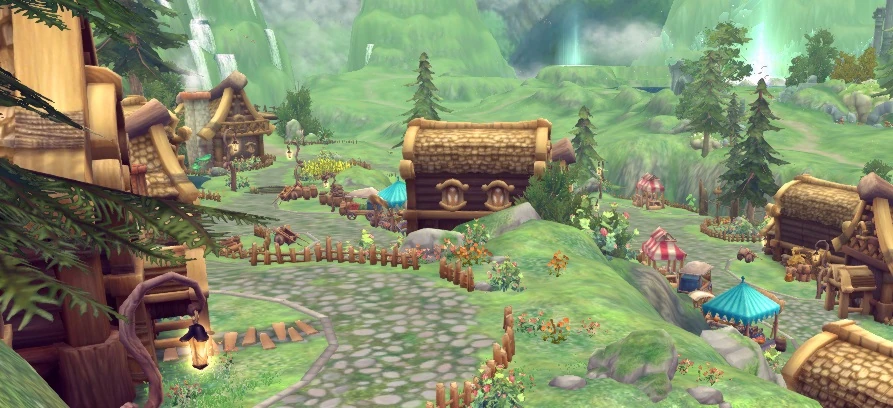
Tomitsa[]

Tomitsa
Tomitsa is a town in Demarech Mines, located in the southeastern region of Demarech Mines, just beyond the other side of the canyon. It is situated near the mountain side with flowing waterfalls. Mason is the town mayor of Tomitsa. Templar Victoria and her troops have stationed themselves in Tomitsa.
The entrance to Cactakara Forest is found near the village.
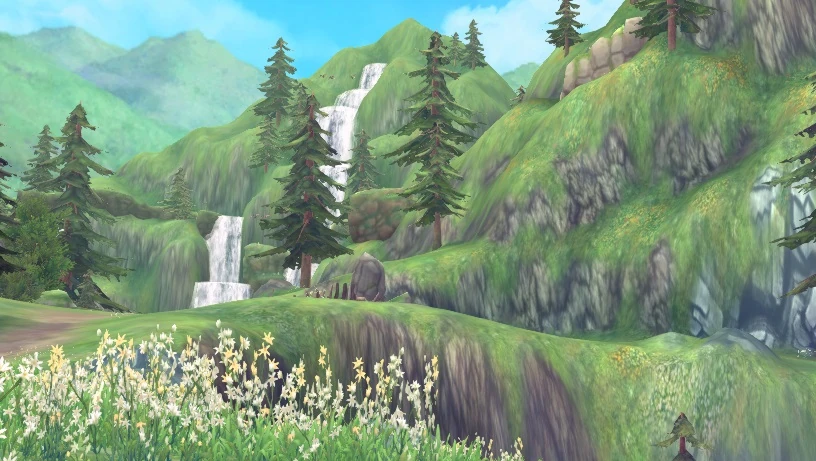
Pitmere Canyon[]

Pitmere Canyon
Pitmere Canyon, as its name states, is a canyon on the western part of Demarech Mines. Several scavenger birds, lions, and angler bugs are found throughout the region.
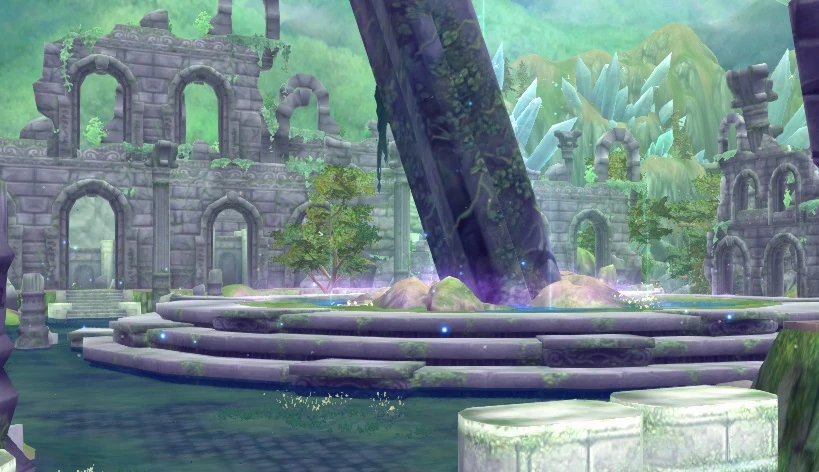
Demarech Pool[]

Demarech Pool
Demarech Pool is located in the center area of Demarech Mines. It is stated to contain an incredible power within. The Shadow Knight used the pool to hide the energy, with the use of the Cube of Gaia. Now, the area is swarming with miracle rock golems and boulder sentries. On the east of Demarech Pool is another Blue Crystal, where several Eidolons appear.
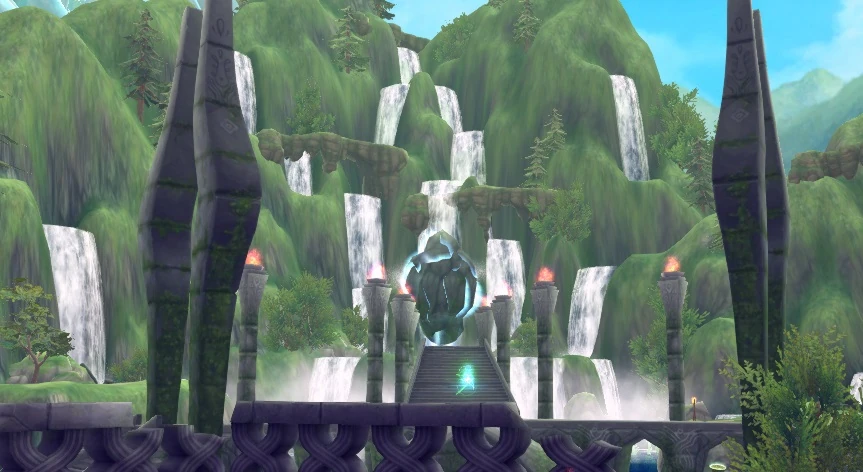
Caerment Altar[]

Caerment Altar
Caerment Altar is located in the eastern region. The area is surrounded by Guardian Golems and Keeper Golems. In recent history, the Shadow Knight re-encountered Hazel, who has reminded her of the oath they have sworn prior to the event. This is also the place where Cube of Gaia was kept before Shadow Knight takes it away when Envoy travel through Hazel's memories.
This area serves as a fishing spot for ordinary fish.
Demarech[]
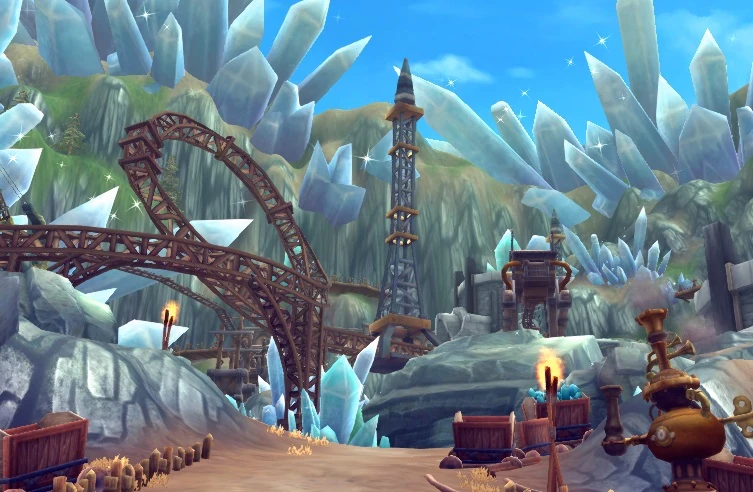

Demarech
Demarech is the mining region on the northern part of Demarech Mines. The area is mainly made up of miracle crystals. But recent events has caused the miracle crystals to be mined in order to craft such materials to create a weapon only an Envoy of Gaia can wield. Harvey and Mason have escaped the grasp of the Shadow Knight and have situated near the mines. Harvey can forge Envoy's new equipment with the same quality as his apprentice, Analisa in this place.
This is also where the first-rated equipment ores are being mined that was often requested by Templar Knights.
Marauder's Camp[]
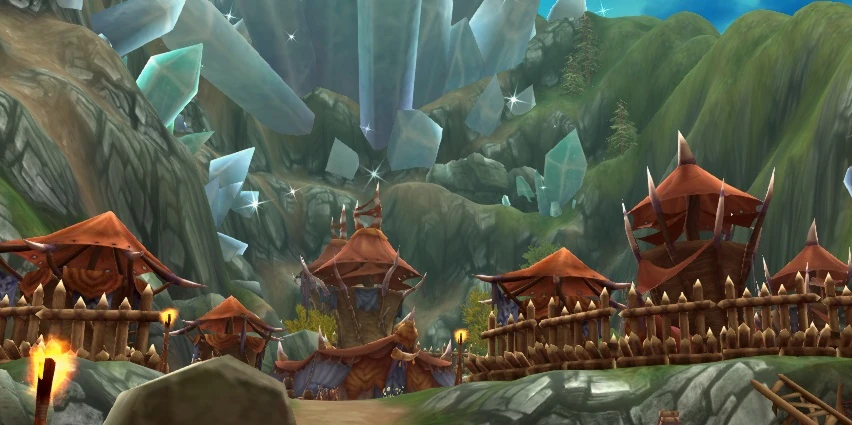

Marauder's Camp
The Marauder's Camp, located in the northeast region, is a campsite for the Shadow Knight. The Demon Army has set up the camp to store all the miracle crystals gathered from Demarech. The Marauder Captain, Solomon, is found deep inside the camp.
The entrance to Miner's Steppe is located within the camp.
Dungeons[]
Portals[]
NPC[]
|
Major
|
Services
|
Minor
| |
Merchants[]
|
|
|
|
|
|
|
Monsters[]
<Iron Beak>
|
Aggr | Coord | |
|---|---|---|---|
| 41 | Passive | X:483, Y:298 |
Angler Bug |
Aggr | Coord | |
|---|---|---|---|
| 41 | Passive | X:595, Y:335 |
Bloodthirsty Lion |
Aggr | Coord | |
|---|---|---|---|
| 41 | Hostile | X:357, Y:183 |
Cliff Lion |
Aggr | Coord | |
|---|---|---|---|
| 41 | Hostile | X:365, Y:234 |
Scavenger Bird |
Aggr | Coord | |
|---|---|---|---|
| 41 | Hostile | X:477, Y:270 |
<Duster>
|
Aggr | Coord | |
|---|---|---|---|
| 42 | Hostile | X:247, Y:419 |
Demarech Slimeling |
Aggr | Coord | |
|---|---|---|---|
| 42 | Hostile | X:612, Y:419 |
Hard-Shelled Angler Bug |
Aggr | Coord | |
|---|---|---|---|
| 42 | Hostile | X:167, Y:208 |
Infected Scavenger Bird |
Aggr | Coord | |
|---|---|---|---|
| 42 | Hostile | X:170, Y:310 |
Leathery Angler Bug |
Aggr | Coord | |
|---|---|---|---|
| 42 | Passive | X:236, Y:191 |
Raging Scavenger Bird |
Aggr | Coord | |
|---|---|---|---|
| 42 | Hostile | X:143, Y:267 |
| Aggr | Coord | ||
|---|---|---|---|
| 42 | Hostile | X:206, Y:267 |
Slimeling |
Aggr | Coord | |
|---|---|---|---|
| 42 | Hostile | X:217, Y:397 |
<Life Creator>
|
Aggr | Coord | |
|---|---|---|---|
| 43 | Passive | X:379, Y:417 |
Boulder Sentry |
Aggr | Coord | |
|---|---|---|---|
| 43 | Hostile | X:379, Y:417 |
Guardian Golem |
Aggr | Coord | |
|---|---|---|---|
| 43 | Hostile | X:705, Y:484 |
Keeper Golem |
Aggr | Coord | |
|---|---|---|---|
| 43 | Hostile | X:804, Y:411 |
Miracle Rock Monster |
Aggr | Coord | |
|---|---|---|---|
| 43 | Hostile | X:379, Y:417 |
Ruins Parasite |
Aggr | Coord | |
|---|---|---|---|
| 43 | Hostile | X:346, Y:324 |
| Aggr | Coord | ||
|---|---|---|---|
| 44 | Hostile | X:197, Y:794 |
Fierce Rock Beetle |
Aggr | Coord | |
|---|---|---|---|
| 44 | Hostile | X:261, Y:704 |
Marauder Miner |
Aggr | Coord | |
|---|---|---|---|
| 44 | Hostile | X:159, Y:760 |
Marauder Porter |
Aggr | Coord | |
|---|---|---|---|
| 44 | Hostile | X:225, Y:656 |
Miracle Rock Beetle |
Aggr | Coord | |
|---|---|---|---|
| 44 | Hostile | X:228, Y:754 |
Rock Beetle |
Aggr | Coord | |
|---|---|---|---|
| 44 | Hostile | X:230, Y:526 |
<Cruel Blood>
|
Aggr | Coord | |
|---|---|---|---|
| 45 | Hostile | X:384, Y:605 |
<Marauder Captain>
|
Aggr | Coord | |
|---|---|---|---|
| 45 | Hostile | X:741, Y:785 |
Camp Miner |
Aggr | Coord | |
|---|---|---|---|
| 45 | Hostile | X:400, Y:718 |
Marauder Assassin |
Aggr | Coord | |
|---|---|---|---|
| 45 | Hostile | X:675, Y:760 |
Marauder Lion Tamer |
Aggr | Coord | |
|---|---|---|---|
| 45 | Hostile | X:535, Y:712 |
Marauder Patrolman |
Aggr | Coord | |
|---|---|---|---|
| 45 | Hostile | X:488, Y:729 |
Stoneskin Lion |
Aggr | Coord | |
|---|---|---|---|
| 45 | Hostile | X:368, Y:583 |
Tamed Lion |
Aggr | Coord | |
|---|---|---|---|
| 45 | Hostile | X:535, Y:712 |
Objects[]
Items[]
School of Fish[]
|
| ||||||||||
Quests[]
Achievements[]
- Main article: Demarech Mines/Achievements
Gallery[]
")
[]
| South Midgard | Navea Port Skandia (1-10) • Helonia Coast (11-20) • Crescent Hill (20-30) • Cactakara Forest (30-40) Demarech Mines (40-45) • Triatio Highlands (45-50) • Candeo Marsh (45-50) • Ventos Prairie (50-55) |
|---|---|
| North Midgard | Oblitus Wood (50-55) • Star Sand Desert (50-55) • Vulture's Vale (60-65) • Blizzard Berg (60-65) Rainmist Reach (62-65) • Emerald Marsh (62-65) • Starstruck Plateau (66-70) • Silent Ice Field (66-70) Port Morton (70-75) • Candetonn Hill (70-75) |
| Principia | Viridian Steppe (75-80) • Desolate Valley (75-80) • Tanglevine Cascades (80-85) • Sunhunter's Vale (80-85) Chronology Forest (85-??) • Tempest Desert (85-??) |
| Misc. | Navea Cathedral • Guild Hall • Hidden Cabin • Thousand Water Marsh |