mNo edit summary Tag: rte-source |
(plus, cooldown needs updating) Tag: sourceedit |
||
| Line 36: | Line 36: | ||
|- style="background-color:#111;" |
|- style="background-color:#111;" |
||
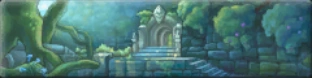
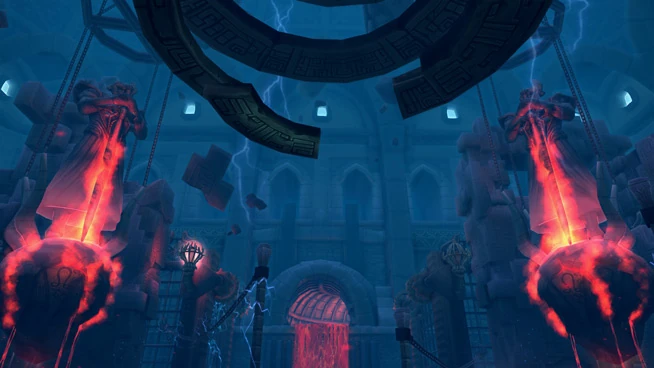
|[[File:Banner Ozymand Temple.png|200px|center]] [[Ozymand Temple]] || Solo, Party, Hell || [[Star Sand Desert]] || 53+ |
|[[File:Banner Ozymand Temple.png|200px|center]] [[Ozymand Temple]] || Solo, Party, Hell || [[Star Sand Desert]] || 53+ |
||
| + | |- style="background-color:#111;" |
||
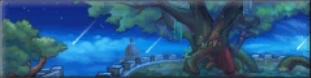
| + | |[[File:Banner Titan's Roots.png|200px|center]] [[Titan's Roots]] || Solo, Party, Hell || [[Rainmist Reach]] || 66+ |
||
| + | |- style="background-color:#111;" |
||
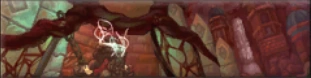
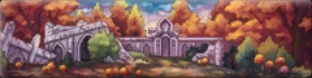
| + | |[[File:Banner Cadilla Felwood.png|200px|center]] [[Cadilla Felwood]] || Solo, Party, Hell || [[Emerald Marsh]] || 66+ |
||
| + | |- style="background-color:#111;" |
||
| + | |[[File:Banner Frozenlea Plains.png|200px|center]] [[Frozenlea Plains]] || Solo, Party, Hell || [[Silent Ice Field]] || 70+ |
||
| + | |- style="background-color:#111;" |
||
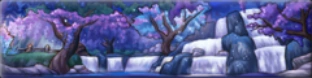
| + | |[[File:Banner Twilight Forest.png|200px|center]] [[Twilight Forest]] || Solo, Party, Hell || [[Desolate Valley]] || 75+ |
||
|} |
|} |
||
| − | === |
+ | ===3-player=== |
{{Main|Dimensional Hall}} |
{{Main|Dimensional Hall}} |
||
Dimensional Hall is a three-player dungeon. |
Dimensional Hall is a three-player dungeon. |
||
| Line 48: | Line 56: | ||
!Level requirement |
!Level requirement |
||
|- style="background-color:#111;" |
|- style="background-color:#111;" |
||
| − | |rowspan=" |
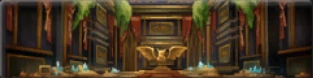
+ | |rowspan="5"|[[File:Dimensionalhall.jpg|center|200px]] [[Dimensional Hall]] |
|[[Crescent Hill]] || 20+ |
|[[Crescent Hill]] || 20+ |
||
|- style="background-color:#111;" |
|- style="background-color:#111;" |
||
| Line 56: | Line 64: | ||
|- style="background-color:#111;" |
|- style="background-color:#111;" |
||
|[[Ventos Prairie]] || 55+ |
|[[Ventos Prairie]] || 55+ |
||
| + | |- style="background-color:#111;" |
||
| + | |[[Rainmist Reach]] || 65+ |
||
| + | |- style="background-color:#111;" |
||
| + | |colspan="2"|[[Monster Research Institute]] || 99+ |
||
|} |
|} |
||
| Line 71: | Line 83: | ||
|- style="background-color:#111;" |
|- style="background-color:#111;" |
||
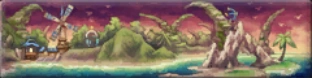
|[[File:Banner Helonia Coast.png|200px|center]] [[Otherworld: Helonia Coast]] || Solo, Party|| [[Cactakara Forest]] || 60+ |
|[[File:Banner Helonia Coast.png|200px|center]] [[Otherworld: Helonia Coast]] || Solo, Party|| [[Cactakara Forest]] || 60+ |
||
| + | |- style="background-color:#111;" |
||
| + | |[[File:Banner Crescent Hill.png|200px|center]] [[Otherworld: Crecent Hill]] || Solo, Party || [[Cactakara Forest]] || 70+ |
||
| + | |- style="background-color:#111;" |
||
| + | |[[File:Banner Emerald Marsh.png|200px|center]] [[Otherworld: Emerald Marsh]] || Solo, Party, Hell || [[Cactakara Forest]] || 75+ |
||
|- style="background-color:#111;" |
|- style="background-color:#111;" |
||
|[[File:Banner Alabastren Temple.png|200px|center]] [[Otherworld: Alabastren Temple]] || Solo, Party, Hell || [[Crescent Hill]] || 60+ |
|[[File:Banner Alabastren Temple.png|200px|center]] [[Otherworld: Alabastren Temple]] || Solo, Party, Hell || [[Crescent Hill]] || 60+ |
||
| Line 77: | Line 93: | ||
|- style="background-color:#111;" |
|- style="background-color:#111;" |
||
|[[File:Banner Miner's Steppe.png|200px|center]] [[Otherworld: Miner's Steppe]] || Solo, Party, Hell || [[Demarech Mines]] || 60+ |
|[[File:Banner Miner's Steppe.png|200px|center]] [[Otherworld: Miner's Steppe]] || Solo, Party, Hell || [[Demarech Mines]] || 60+ |
||
| + | |- style="background-color:#111;" |
||
| + | |[[File:Banner Deep's Cavern.png|200px|center]] [[Otherworld: Deep's Cavern]] || Solo, Party, Hell || [[Triatio Highlands]] || 70+ |
||
| + | |- style="background-color:#111;" |
||
| + | |[[File:Banner Candeo Core.png|200px|center]] [[Otherworld: Candeo Core]] || Solo, Party, Hell || [[Candeo Marsh]] || 70+ |
||
|} |
|} |
||
| Line 98: | Line 118: | ||
|- style="background-color:#111;" |
|- style="background-color:#111;" |
||
|[[Temple of the Eidolons]] || Solo || [[Crescent Hill]] || 30+ |
|[[Temple of the Eidolons]] || Solo || [[Crescent Hill]] || 30+ |
||
| + | |- style="background-color:#111;" |
||
| + | |[[Holy Land of Gaia]] || Solo || [[Crescent Hill]] || 70+ |
||
| + | |- style="background-color:#111;" |
||
| + | |[[Gaia's Sanctuary]] || Party || [[Crescent Hill]] || 70+ |
||
|- style="background-color:#111;" |
|- style="background-color:#111;" |
||
|[[Infernal Abyss]] || Party || [[Ventos Prairie]] || 55+ |
|[[Infernal Abyss]] || Party || [[Ventos Prairie]] || 55+ |
||
|- style="background-color:#111;" |
|- style="background-color:#111;" |
||
|[[Whirlpool Abyss]] || Party || [[Helonia Coast]] || 60+ |
|[[Whirlpool Abyss]] || Party || [[Helonia Coast]] || 60+ |
||
| + | |- style="background-color:#111;" |
||
| + | |[[Dark Shadow Abyss]] || Solo || || 75+ |
||
| + | |- style="background-color:#111;" |
||
| + | |[[Avarice Abyss]] || Solo Challenge, Party, Hell || || 75+ |
||
|- style="background-color:#111;" |
|- style="background-color:#111;" |
||
|[[Lament of the Thunder-Dragon King]] || Party || [[Crescent Hill]] || 65+ |
|[[Lament of the Thunder-Dragon King]] || Party || [[Crescent Hill]] || 65+ |
||
|- style="background-color:#111;" |
|- style="background-color:#111;" |
||
|[[Landing of the Sky Dragon King]] || Party || [[Cactakara Forest]] || 65+ |
|[[Landing of the Sky Dragon King]] || Party || [[Cactakara Forest]] || 65+ |
||
| + | |- style="background-color:#111;" |
||
| + | |[[Siege of the Aqua-Dragon Queen]] || Party || [[Demarech Mines]] || 65+ |
||
| + | |- style="background-color:#111;" |
||
| + | |[[Subterranean Ruins]] || Solo || [[Star Sand Desert]] || 50+, 60+, 70+ |
||
| + | |- style="background-color:#111;" |
||
| + | |[[Hall of Philae]] || Solo || [[Star Sand Desert]] || 65+ |
||
| + | |- style="background-color:#111;" |
||
| + | |[[Fight Club]] || Solo || [[Navea]] || 50+ |
||
| + | |- style="background-color:#111;" |
||
| + | |[[Duelists' Temple]] || Solo || [[Navea]] || 65+ |
||
|- style="background-color:#111;" |
|- style="background-color:#111;" |
||
|[[Sky Tower]] || Raid || [[Navea]] || 60+ |
|[[Sky Tower]] || Raid || [[Navea]] || 60+ |
||
| + | |- style="background-color:#111;" |
||
| + | |[[Pyroclastic Purgatory]] || Party || [[Oblitus Wood]] || 70+ |
||
| + | |- style="background-color:#111;" |
||
| + | |[[Tempestuous Temple]] || Party || [[Star Sand Desert]] || 70+ |
||
| + | |- style="background-color:#111;" |
||
| + | |[[Dark Thunder Temple]] || Party || [[Ventos Prairie]] || 75+ |
||
|} |
|} |
||
| Line 148: | Line 192: | ||
|[[Whirlpool Abyss]]|| Party || Every Day |
|[[Whirlpool Abyss]]|| Party || Every Day |
||
|- style="background-color:#111;" |
|- style="background-color:#111;" |
||
| − | |[[Lament of the Thunder-Dragon King]] || Party ||rowspan=" |
+ | |[[Lament of the Thunder-Dragon King]] || Party ||rowspan="3"|Gain one entry every 6 hours starting from 6:00 AM EST/EDT || Every day |
|- style="background-color:#111;" |
|- style="background-color:#111;" |
||
|[[Landing of the Sky Dragon King]] || Party || Every day |
|[[Landing of the Sky Dragon King]] || Party || Every day |
||
| + | |- style="background-color:#111;" |
||
| + | |[[Siege of the Aqua-Dragon Queen]] || Party || Every day |
||
|} |
|} |
||
[[Category:Dungeons]] |
[[Category:Dungeons]] |
||
Revision as of 02:32, 13 June 2016
Dungeons, or instances, are found anywhere in the world of Azuria, except in cities like Navea. Inside each location lies a Dungeon which is filled with elite monsters that give special equipment, quest completion, achievements, and help players gain even more experience. A dungeon quest is usually given at last before going to the next town.
Overview
These areas are the most strongest that players will have to create a group to fight together. Dungeons also give an opportunity to players for cooperation creating a party.
Players could accept a dungeon quest that either tells the player to form a party or just go by themself. Solo mode consists of weaker monsters and a shorter dungeon that is meant for one player. Party mode, along with Hell mode, gives the opportunity for players to join one another to form a maximum of five people per party and tackle the dungeon in Party or Hell mode.
Modes
- Solo - 1-player dungeon
- Party - 5-player dungeon
- Hell - 5-player dungeon
- Dimensional Hall - 3-player dungeon
Dungeons
Instances
| Dungeon | Modes | Location | Level requirement |
|---|---|---|---|
 |
Solo, Party, Hell | Crescent Hill | 28+ |
 |
Solo, Party, Hell | Cactakara Forest | 38+ |
 |
Solo, Party, Hell | Demarech Mines | 43+ |
 |
Solo, Party, Hell | Triatio Highlands | 48+ |
 |
Solo, Party, Hell | Candeo Marsh | 48+ |
 |
Solo, Party, Hell | Ventos Prairie | 53+ |
 |
Solo, Party, Hell | Oblitus Wood | 53+ |
 |
Solo, Party, Hell | Star Sand Desert | 53+ |
 |
Solo, Party, Hell | Rainmist Reach | 66+ |
 |
Solo, Party, Hell | Emerald Marsh | 66+ |
 |
Solo, Party, Hell | Silent Ice Field | 70+ |
 |
Solo, Party, Hell | Desolate Valley | 75+ |
3-player
- Main article: Dimensional Hall
Dimensional Hall is a three-player dungeon.
| Dungeon | Location | Level requirement |
|---|---|---|
 |
Crescent Hill | 20+ |
| Cactakara Forest | 35+ | |
| Candeo Marsh | 45+ | |
| Ventos Prairie | 55+ | |
| Rainmist Reach | 65+ | |
| Monster Research Institute | 99+ | |
Otherworld
Otherworld is a parallel version of the original dungeon. It contains stronger monsters than its counterpart.
| Dungeon | Modes | Location | Level requirement |
|---|---|---|---|
 |
Solo, Party | Cactakara Forest | 50+ |
 |
Solo, Party | Cactakara Forest | 60+ |
 |
Solo, Party | Cactakara Forest | 70+ |
 |
Solo, Party, Hell | Cactakara Forest | 75+ |
|
Solo, Party, Hell | Crescent Hill | 60+ |
|
Solo, Party, Hell | Cactakara Forest | 60+ |
|
Solo, Party, Hell | Demarech Mines | 60+ |
|
Solo, Party, Hell | Triatio Highlands | 70+ |
|
Solo, Party, Hell | Candeo Marsh | 70+ |
Other
| Dungeon | Modes | Location | Level requirement |
|---|---|---|---|
| Ruins Cave | Solo | Port Skandia | 1+ |
| Hidden Cave | Solo | Port Skandia | 9+ |
| Southwest Helonia Mountain Cave | Solo | Helonia Coast | 10+ |
| North Helonia Mountain Cave | Solo | Helonia Coast | 15+ |
| Former Site of Lunarin Village | Solo | Crescent Hill | 20+ |
| Temple of the Eidolons | Solo | Crescent Hill | 30+ |
| Holy Land of Gaia | Solo | Crescent Hill | 70+ |
| Gaia's Sanctuary | Party | Crescent Hill | 70+ |
| Infernal Abyss | Party | Ventos Prairie | 55+ |
| Whirlpool Abyss | Party | Helonia Coast | 60+ |
| Dark Shadow Abyss | Solo | 75+ | |
| Avarice Abyss | Solo Challenge, Party, Hell | 75+ | |
| Lament of the Thunder-Dragon King | Party | Crescent Hill | 65+ |
| Landing of the Sky Dragon King | Party | Cactakara Forest | 65+ |
| Siege of the Aqua-Dragon Queen | Party | Demarech Mines | 65+ |
| Subterranean Ruins | Solo | Star Sand Desert | 50+, 60+, 70+ |
| Hall of Philae | Solo | Star Sand Desert | 65+ |
| Fight Club | Solo | Navea | 50+ |
| Duelists' Temple | Solo | Navea | 65+ |
| Sky Tower | Raid | Navea | 60+ |
| Pyroclastic Purgatory | Party | Oblitus Wood | 70+ |
| Tempestuous Temple | Party | Star Sand Desert | 70+ |
| Dark Thunder Temple | Party | Ventos Prairie | 75+ |
Dungeon resets
Times are based on Eastern Time (GMT -5 EST/ GMT -4 EDT), the server time.
| Type of dungeon | Mode | Reset time | Availability |
|---|---|---|---|
| Regular dungeons | Solo, Party, Hell | One entry every 2 hours starting from 6:00 AM EST/EDT | Every day |
| Temple of the Eidolons | Solo | One entry every 6 hours starting from 6:00 AM EST/EDT | Every day |
| Otherworld: Port Skandia | Party | One entry every 3 hours starting from 6:00 AM EST/EDT | Every day |
| Otherworld: Helonia Coast | |||
| Otherworld: Alabastren Temple | Party | One entry every 2 hours starting from 6:00 AM EST/EDT | Every day |
| Hell | One entry every 3 hours starting from 6:00 AM EST/EDT | Every day | |
| Otherworld: Gydaie Glen | Party | One entry every 2 hours starting from 6:00 AM EST/EDT | Every day |
| Hell | One entry every 3 hours starting from 6:00 AM EST/EDT | Every day | |
| Otherworld: Miner's Steppe | Party | One entry every 2 hours starting from 6:00 AM EST/EDT | Every day |
| Hell | One entry every 3 hours starting from 6:00 AM EST/EDT | Every day | |
| Sky Tower | Raid | -- | Saturday and Sunday |
| Infernal Abyss | Party | Gain one entry every 8 hours starting from 6:00 AM EST/EDT | Every day |
| Whirlpool Abyss | Party | Every Day | |
| Lament of the Thunder-Dragon King | Party | Gain one entry every 6 hours starting from 6:00 AM EST/EDT | Every day |
| Landing of the Sky Dragon King | Party | Every day | |
| Siege of the Aqua-Dragon Queen | Party | Every day |