No edit summary |
No edit summary Tag: rte-wysiwyg |
||
| (19 intermediate revisions by 8 users not shown) | |||
| Line 1: | Line 1: | ||
| + | '''Dungeons''', or ''instances'', are found anywhere in the world of [[Azuria]], except in cities like [[Navea]]. Inside each location lies a Dungeon which is filled with elite monsters that give special equipment, quest completion, achievements, and help players gain even more experience. A dungeon quest is usually given at last before going to the next town. |
||
| − | {{Stub}}{{Unverified}} |
||
| + | |||
| − | '''Dungeons''' are found anywhere in the world of [[Azuria]], except in cities like [[Navea]]. Inside each location lies a Dungeon which is filled with elite monsters that give special equipment, quest completion, achievements, and help players gain even more EXP. A dungeon quest is usually given at last before going to the next town. |
||
==Overview== |
==Overview== |
||
These areas are the most strongest that players will have to create a group to fight together. Dungeons also give an opportunity to players for cooperation creating a [[party]]. |
These areas are the most strongest that players will have to create a group to fight together. Dungeons also give an opportunity to players for cooperation creating a [[party]]. |
||
| − | Players could accept a dungeon quest that either tells |
+ | Players could accept a dungeon quest that either tells the player to form a party or just go by themself. Solo mode consists of weaker monsters and a shorter dungeon that is meant for one player. Party mode, along with Hell mode, gives the opportunity for players to join one another to form a maximum of five people per party and tackle the dungeon in Party or Hell mode. |
| + | |||
| + | ===Modes=== |
||
| + | *Solo - 1-player dungeon |
||
| + | *Party - 5-player dungeon |
||
| + | *Hell - 5-player dungeon |
||
| + | *Dimensional Hall - 3-player dungeon |
||
| + | |||
==Dungeons== |
==Dungeons== |
||
| + | ===Instances=== |
||
| − | There are Solo Dungeons, 3-player Dungeons, 5-player Dungeons, (TBA when game release). If a party member leaves or is in other occasions, the party leader could reset the dungeon so everybody gets a chance to complete it. |
||
| + | {|style="width:100%; border:1px solid #000; background-color:#333; color:#fff; text-align:center; box-shadow:1px 1px 3px #111; border-radius:5px;" cellspacing="1" |
||
| − | ===Solo Dungeons=== |
||
| + | |- |
||
| − | TBA |
||
| + | !Dungeon |
||
| − | ===3-player Dungeons=== |
||
| + | !Modes |
||
| − | TBA |
||
| + | !Location |
||
| − | ===5-player Dungeons=== |
||
| + | !Level requirement |
||
| − | TBA |
||
| + | |- style="background-color:#111;" |
||
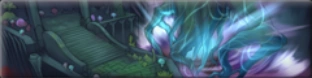
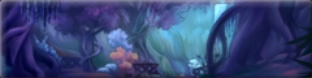
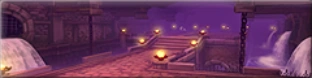
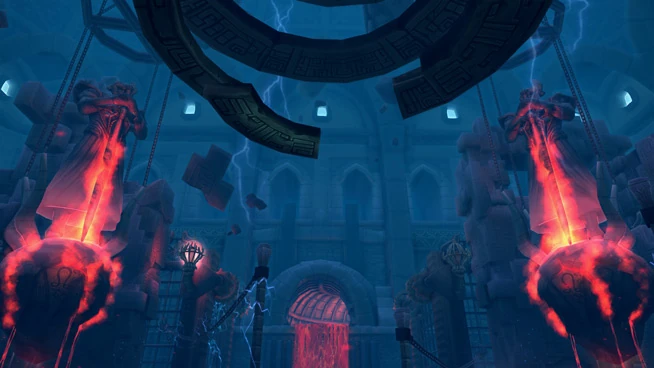
| + | |[[File:Banner Alabastren Temple.png|200px|center]] [[Alabastren Temple]] || Solo, Party, Hell || [[Crescent Hill]] || 28+ |
||
| + | |- style="background-color:#111;" |
||
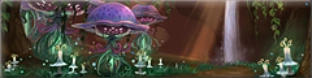
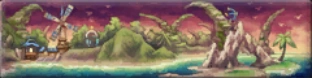
| + | |[[File:Banner Gydaie Glen.png|200px|center]] [[Gydaie Glen]] || Solo, Party, Hell || [[Cactakara Forest]] || 38+ |
||
| + | |- style="background-color:#111;" |
||
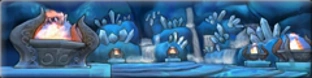
| + | |[[File:Banner Miner's Steppe.png|200px|center]] [[Miner's Steppe]] || Solo, Party, Hell || [[Demarech Mines]] || 43+ |
||
| + | |- style="background-color:#111;" |
||
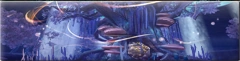
| + | |[[File:Banner Deep's Cavern.png|200px|center]] [[Deep's Cavern]] || Solo, Party, Hell || [[Triatio Highlands]] || 48+ |
||
| + | |- style="background-color:#111;" |
||
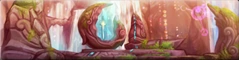
| + | |[[File:Banner Candeo Core.png|200px|center]] [[Candeo Core]] || Solo, Party, Hell || [[Candeo Marsh]] || 48+ |
||
| + | |- style="background-color:#111;" |
||
| + | |[[File:Banner Wrathborne Temple.png|200px|center]] [[Wrathborne Temple]] || Solo, Party, Hell || [[Ventos Prairie]] || 53+ |
||
| + | |- style="background-color:#111;" |
||
| + | |[[File:Banner Ghostweep Cave.png|200px|center]] [[Ghostweep Cave]] || Solo, Party, Hell || [[Oblitus Wood]] || 53+ |
||
| + | |- style="background-color:#111;" |
||
| + | |[[File:Banner Ozymand Temple.png|200px|center]] [[Ozymand Temple]] || Solo, Party, Hell || [[Star Sand Desert]] || 53+ |
||
| + | |- style="background-color:#111;" |
||
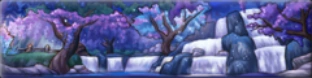
| + | |[[File:Banner Titan's Roots.png|200px|center]] [[Titan's Roots]] || Solo, Party, Hell || [[Rainmist Reach]] || 66+ |
||
| + | |- style="background-color:#111;" |
||
| + | |[[File:Banner Cadilla Felwood.png|200px|center]] [[Cadilla Felwood]] || Solo, Party, Hell || [[Emerald Marsh]] || 66+ |
||
| + | |- style="background-color:#111;" |
||
| + | |[[File:Banner Frozenlea Plains.png|200px|center]] [[Frozenlea Plains]] || Solo, Party, Hell || [[Silent Ice Field]] || 70+ |
||
| + | |- style="background-color:#111;" |
||
| + | |[[File:Banner Twilight Forest.png|200px|center]] [[Twilight Forest]] || Solo, Party, Hell || [[Desolate Valley]] || 75+ |
||
| + | |- style="background-color:#111;" |
||
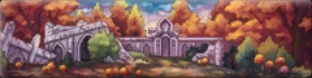
| + | |[[File:Banner Sarpa's Forbidden Laboratory.png|200px|center]] [[Sarpa's Forbidden Laboratory]] || Solo, Party, Hell || [[Tanglevine Cascades]] || 80+ |
||
| + | |- style="background-color:#111;" |
||
| + | |[[File:Banner Tomb of the Ancients.png|200px|center]] [[Tomb of the Ancients]] || Solo, Party, Hell || [[Sunhunter's Vale]] || 80+ |
||
| + | |- style="background-color:#111;" |
||
| + | |[[File:Banner Chronowood Cavern.png|200px|center]] [[Chronowood Cavern]] || Solo, Party, Hell || [[Chronology Forest]] || 85+ |
||
| + | |- style="background-color:#111;" |
||
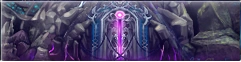
| + | |[[File:Banner Shattered Netherworld.png|200px|center]] [[Shattered Netherworld]] || Solo, Party, Hell|| [[Tempest Desert]] || 85+ |
||
| + | |} |
||
| + | |||
| + | ===3-player=== |
||
| + | {{Main|Dimensional Hall}} |
||
| + | Dimensional Hall is a three-player dungeon. |
||
| + | |||
| + | {|style="width:100%; border:1px solid #000; background-color:#333; color:#fff; text-align:center; box-shadow:1px 1px 3px #111; border-radius:5px;" cellspacing="1" |
||
| + | |- |
||
| + | !Dungeon |
||
| + | !Location |
||
| + | !Level requirement |
||
| + | |- style="background-color:#111;" |
||
| + | |rowspan="6"|[[File:Dimensionalhall.jpg|center|200px]] [[Dimensional Hall]] |
||
| + | |[[Crescent Hill]] || 20+ |
||
| + | |- style="background-color:#111;" |
||
| + | |[[Cactakara Forest]] || 35+ |
||
| + | |- style="background-color:#111;" |
||
| + | |[[Candeo Marsh]] || 45+ |
||
| + | |- style="background-color:#111;" |
||
| + | |[[Ventos Prairie]] || 55+ |
||
| + | |- style="background-color:#111;" |
||
| + | |[[Rainmist Reach]] || 65+ |
||
| + | |- style="background-color:#111;" |
||
| + | |[[Port Morton]] || 75+ |
||
| + | |- style="background-color:#111;" |
||
| + | |colspan="2"|[[Monster Research Institute]] || 99+ |
||
| + | |} |
||
| + | |||
| + | ===Otherworld=== |
||
| + | Otherworld is a parallel version of the original dungeon. It contains stronger monsters than its counterpart. |
||
| + | |||
| + | {|style="width:100%; border:1px solid #000; background-color:#333; color:#fff; text-align:center; box-shadow:1px 1px 3px #111; border-radius:5px;" cellspacing="1" |
||
| + | |- |
||
| + | !Dungeon |
||
| + | !Modes |
||
| + | !Location |
||
| + | !Level requirement |
||
| + | |- style="background-color:#111;" |
||
| + | |[[File:Banner Port Skandia.png|200px|center]] [[Otherworld: Port Skandia]] || Solo, Party|| [[Cactakara Forest]] || 50+ |
||
| + | |- style="background-color:#111;" |
||
| + | |[[File:Banner Helonia Coast.png|200px|center]] [[Otherworld: Helonia Coast]] || Solo, Party|| [[Cactakara Forest]] || 60+ |
||
| + | |- style="background-color:#111;" |
||
| + | |[[File:Banner Crescent Hill.png|200px|center]] [[Otherworld: Crecent Hill]] || Solo, Party || [[Cactakara Forest]] || 70+ |
||
| + | |- style="background-color:#111;" |
||
| + | |[[File:Banner Emerald Marsh.png|200px|center]] [[Otherworld: Emerald Marsh]] || Solo, Party, Hell || [[Cactakara Forest]] || 75+ |
||
| + | |- style="background-color:#111;" |
||
| + | |[[File:Banner Silent Ice Field.jpg|200px|center]] [[Otherworld: Silent Ice Field]] || Solo, Party, Hell || [[Cactakara Forest]] || 85+ |
||
| + | |- style="background-color:#111;" |
||
| + | |[[File:Banner Alabastren Temple.png|200px|center]] [[Otherworld: Alabastren Temple]] || Solo, Party, Hell || [[Crescent Hill]] || 60+ |
||
| + | |- style="background-color:#111;" |
||
| + | |[[File:Banner Gydaie Glen.png|200px|center]] [[Otherworld: Gydaie Glen]] || Solo, Party, Hell || [[Cactakara Forest]] || 60+ |
||
| + | |- style="background-color:#111;" |
||
| + | |[[File:Banner Miner's Steppe.png|200px|center]] [[Otherworld: Miner's Steppe]] || Solo, Party, Hell || [[Demarech Mines]] || 60+ |
||
| + | |- style="background-color:#111;" |
||
| + | |[[File:Banner Deep's Cavern.png|200px|center]] [[Otherworld: Deep's Cavern]] || Solo, Party, Hell || [[Triatio Highlands]] || 70+ |
||
| + | |- style="background-color:#111;" |
||
| + | |[[File:Banner Candeo Core.png|200px|center]] [[Otherworld: Candeo Core]] || Solo, Party, Hell || [[Candeo Marsh]] || 70+ |
||
| + | |- style="background-color:#111;" |
||
| + | |[[File:Banner Titan's Roots.png|200px|center]] [[Otherworld: Titan's Roots]] || Solo, Party, Hell || [[Rainmist Reach]] || 75+ |
||
| + | |- style="background-color:#111;" |
||
| + | |[[File:Banner Cadilla Felwood.png|200px|center]] [[Otherworld: Cadilla Felwood]] || Solo, Party, Hell || [[Emerald Marsh]] || 75+ |
||
| + | |- style="background-color:#111;" |
||
| + | |[[File:Banner Twilight Forest.png|200px|center]] [[Otherworld: Twilight Forest]] || Solo, Party, Hell || [[Desolate Valley]] || 80+ |
||
| + | |- style="background-color:#111;" |
||
| + | |[[File:Banner Sarpa's Forbidden Laboratory.png|200px|center]] [[Otherworld: Sarpa's Forbidden Laboratory]] || Solo, Party || [[Tanglevine Cascades]] || 85+ |
||
| + | |- style="background-color:#111;" |
||
| + | |[[File:Banner Tomb of the Ancients.png|200px|center]] [[Otherworld: Tomb of the Ancients]] || Solo, Party || [[Sunhunter's Vale]] || 85+ |
||
| + | |} |
||
| + | |||
| + | ===Other=== |
||
| + | {|style="width:100%; border:1px solid #000; background-color:#333; color:#fff; text-align:center; box-shadow:1px 1px 3px #111; border-radius:5px;" cellspacing="1" |
||
| + | |- |
||
| + | !Dungeon |
||
| + | !Modes |
||
| + | !Location |
||
| + | !Level requirement |
||
| + | |- style="background-color:#111;" |
||
| + | |[[Ruins Cave]] || Solo || [[Port Skandia]] || 1+ |
||
| + | |- style="background-color:#111;" |
||
| + | |[[Hidden Cave]] || Solo || [[Port Skandia]] || 9+ |
||
| + | |- style="background-color:#111;" |
||
| + | |[[Southwest Helonia Mountain Cave]] || Solo || [[Helonia Coast]] || 10+ |
||
| + | |- style="background-color:#111;" |
||
| + | |[[North Helonia Mountain Cave]] || Solo || [[Helonia Coast]] || 15+ |
||
| + | |- style="background-color:#111;" |
||
| + | |[[Former Site of Lunarin Village]] || Solo || [[Crescent Hill]] || 20+ |
||
| + | |- style="background-color:#111;" |
||
| + | |[[Temple of the Eidolons]] || Solo || [[Crescent Hill]] || 30+ |
||
| + | |- style="background-color:#111;" |
||
| + | |[[Holy Land of Gaia]] || Solo || [[Crescent Hill]] || 70+ |
||
| + | |- style="background-color:#111;" |
||
| + | |[[Gaia's Sanctuary]] || Party || [[Crescent Hill]] || 70+ |
||
| + | |- style="background-color:#111;" |
||
| + | |[[Infernal Abyss]] || Solo, Party || [[Ventos Prairie]] || 55+ |
||
| + | |- style="background-color:#111;" |
||
| + | |[[Whirlpool Abyss]] || Solo, Party || [[Helonia Coast]] || 60+ |
||
| + | |- style="background-color:#111;" |
||
| + | |[[Dark Shadow Abyss]] || Solo || [[Viridian Steppe]] || 75+ |
||
| + | |- style="background-color:#111;" |
||
| + | |[[Avarice Abyss]] || Solo Challenge, Party, Hell || [[Viridian Steppe]] || 75+ |
||
| + | |- style="background-color:#111;" |
||
| + | |[[Vault of Eternity]] || Solo || [[Sunhunter's Vale]] || 80+ |
||
| + | |- style="background-color:#111;" |
||
| + | |[[Abyss of Light]] || Solo, Party, Hell || [[Chronology Forest]] || 85+ |
||
| + | |- style="background-color:#111;" |
||
| + | |[[Lament of the Thunder-Dragon King]] || Party || [[Crescent Hill]] || 65+ |
||
| + | |- style="background-color:#111;" |
||
| + | |[[Landing of the Sky Dragon King]] || Party || [[Cactakara Forest]] || 65+ |
||
| + | |- style="background-color:#111;" |
||
| + | |[[Siege of the Aqua-Dragon Queen]] || Party || [[Demarech Mines]] || 65+ |
||
| + | |- style="background-color:#111;" |
||
| + | |[[Thunder Temple of the Underworld Baroness]] || Party || [[Ventos Prairie]] || 75+ |
||
| + | |- style="background-color:#111;" |
||
| + | |[[Subterranean Ruins]] || Solo || [[Star Sand Desert]] || 50+, 60+, 70+ |
||
| + | |- style="background-color:#111;" |
||
| + | |[[Hall of Philae]] || Solo || [[Star Sand Desert]] || 65+ |
||
| + | |- style="background-color:#111;" |
||
| + | |[[Fight Club]] || Solo || [[Navea]] || 50+ |
||
| + | |- style="background-color:#111;" |
||
| + | |[[Duelists' Temple]] || Solo || [[Navea]] || 65+ |
||
| + | |- style="background-color:#111;" |
||
| + | |[[Sky Tower]] || Raid || [[Navea]] || 60+ |
||
| + | |- style="background-color:#111;" |
||
| + | |[[Pyroclastic Purgatory]] || Party || [[Oblitus Wood]] || 70+ |
||
| + | |- style="background-color:#111;" |
||
| + | |[[Tempestuous Temple]] || Party || [[Star Sand Desert]] || 70+ |
||
| + | |- style="background-color:#111;" |
||
| + | |[[Dark Thunder Temple]] || Party || [[Ventos Prairie]] || 75+ |
||
| + | |} |
||
| + | |||
| + | ==Dungeon resets== |
||
| + | ''Times are based on Eastern Time (GMT -5 EST/ GMT -4 EDT), the server time.'' |
||
| + | {|style="width:100%; border:1px solid #000; background-color:#333; color:#fff; text-align:center; box-shadow:1px 1px 3px #111; border-radius:5px;" cellspacing="1" |
||
| + | |- |
||
| + | !style="width:20%;"|Type of dungeon |
||
| + | !style="width:15%;"|Mode |
||
| + | !style="width:45%;"|Reset time |
||
| + | !style="width:20%;"|Availability |
||
| + | |- style="background-color:#111;" |
||
| + | |Regular dungeons||Solo, Solo Challenge, Party, Hell||One entry every 2 hours starting from 6:00 AM EST/EDT||Every day |
||
| + | |- style="background-color:#111;" |
||
| + | |[[Temple of the Eidolons]]||Solo||One entry every 6 hours starting from 6:00 AM EST/EDT||Every day |
||
| + | |- style="background-color:#111;" |
||
| + | |[[Holy Land of Gaia]]||Solo||One entry every 24 hours starting from 6:00 AM EST/EDT||Every day |
||
| + | |- style="background-color:#111;" |
||
| + | |[[Gaia Sanctuary]]||Solo, Trial 5-players, 5-players||One entry every 24 hours starting from 6:00 AM EST/EDT||Every day |
||
| + | |- style="background-color:#111;" |
||
| + | |[[Otherworld: Port Skandia]] |
||
| + | |rowspan="4"|Solo, Solo Challenge, Party, Hell |
||
| + | |rowspan="4"|One entry every 3 hours starting from 6:00 AM EST/EDT |
||
| + | |rowspan="4"|Every day |
||
| + | |- style="background-color:#111;" |
||
| + | |[[Otherworld: Helonia Coast]] |
||
| + | |- style="background-color:#111;" |
||
| + | |[[Otherworld: Crescent Hill]] |
||
| + | |- style="background-color:#111;" |
||
| + | |[[Otherworld: Emerald Marsh]] |
||
| + | |- style="background-color:#111;" |
||
| + | |rowspan="2"|[[Otherworld: Alabastren Temple]]||Solo, Party||One entry every 2 hours starting from 6:00 AM EST/EDT||Every day |
||
| + | |- style="background-color:#111;" |
||
| + | |Solo Challenge, Hell||One entry every 3 hours starting from 6:00 AM EST/EDT||Every day |
||
| + | |- style="background-color:#111;" |
||
| + | |rowspan="2"|[[Otherworld: Gydaie Glen]]||Solo, Party||One entry every 2 hours starting from 6:00 AM EST/EDT||Every day |
||
| + | |- style="background-color:#111;" |
||
| + | |Solo Challenge, Hell||One entry every 3 hours starting from 6:00 AM EST/EDT||Every day |
||
| + | |- style="background-color:#111;" |
||
| + | |rowspan="2"|[[Otherworld: Miner's Steppe]]||Solo, Party||One entry every 2 hours starting from 6:00 AM EST/EDT||Every day |
||
| + | |- style="background-color:#111;" |
||
| + | |Solo Challenge, Hell||One entry every 3 hours starting from 6:00 AM EST/EDT||Every day |
||
| + | |- style="background-color:#111;" |
||
| + | |rowspan="2"|[[Otherworld: Candeo Core]]||Solo, Party||One entry every 2 hours starting from 6:00 AM EST/EDT||Every day |
||
| + | |- style="background-color:#111;" |
||
| + | |Solo Challenge, Hell||One entry every 3 hours starting from 6:00 AM EST/EDT||Every day |
||
| + | |- style="background-color:#111;" |
||
| + | |rowspan="2"|[[Otherworld: Deep's Cavern]]||Solo, Party||One entry every 2 hours starting from 6:00 AM EST/EDT||Every day |
||
| + | |- style="background-color:#111;" |
||
| + | |Solo Challenge, Hell||One entry every 3 hours starting from 6:00 AM EST/EDT||Every day |
||
| + | |- style="background-color:#111;" |
||
| + | |rowspan="2"|[[Otherworld: Titan's Roots]]||Solo, Party||One entry every 2 hours starting from 6:00 AM EST/EDT||Every day |
||
| + | |- style="background-color:#111;" |
||
| + | |Solo Challenge, Hell||One entry every 3 hours starting from 6:00 AM EST/EDT||Every day |
||
| + | |- style="background-color:#111;" |
||
| + | |rowspan="2"|[[Otherworld: Cadilla Felwood]]||Solo, Party||One entry every 2 hours starting from 6:00 AM EST/EDT||Every day |
||
| + | |- style="background-color:#111;" |
||
| + | |Solo Challenge, Hell||One entry every 3 hours starting from 6:00 AM EST/EDT||Every day |
||
| + | |- style="background-color:#111;" |
||
| + | |[[Sky Tower]]|| Raid || -- ||Saturday and Sunday |
||
| + | |- style="background-color:#111;" |
||
| + | |[[Fight Club]]|| Solo || Unlimited entries ||Every day |
||
| + | |- style="background-color:#111;" |
||
| + | |[[Hall of Philae]]|| Solo || One entry every 24 hours starting from 6:00 AM EST/EDT||Every day |
||
| + | |- style="background-color:#111;" |
||
| + | |[[Duelists' Temple]]|| Solo || One entry every 24 hours starting from 6:00 AM EST/EDT||Every day |
||
| + | |- style="background-color:#111;" |
||
| + | |[[Infernal Abyss]]|| Solo, Party ||rowspan="3"|One entry every 8 hours starting from 6:00 AM EST/EDT || Every day |
||
| + | |- style="background-color:#111;" |
||
| + | |[[Whirlpool Abyss]]|| Solo, Party || Every day |
||
| + | |- style="background-color:#111;" |
||
| + | |[[Dark Shadow Abyss]]<br />[[Avarice Abyss]]|| Solo, Solo Challenge, Party, Hell || Every day |
||
| + | |- style="background-color:#111;" |
||
| + | |[[Lament of the Thunder-Dragon King]] || Party ||rowspan="4"|One entry every 6 hours starting from 6:00 AM EST/EDT || Every day |
||
| + | |- style="background-color:#111;" |
||
| + | |[[Landing of the Sky Dragon King]] || Party || Every day |
||
| + | |- style="background-color:#111;" |
||
| + | |[[Siege of the Aqua-Dragon Queen]] || Party || Every day |
||
| + | |- style="background-color:#111;" |
||
| + | |[[Thunder Temple of the Underworld Baroness]] || Party || Every day |
||
| + | |- style="background-color:#111;" |
||
| + | |[[Tempestuous Temple]] || Party || One entry every 6 hours starting from 6:00 AM EST/EDT || Every day |
||
| + | |- style="background-color:#111;" |
||
| + | |[[Pyroclastic Purgatory]] || Party || One entry every 6 hours starting from 6:00 AM EST/EDT || Every day |
||
| + | |- style="background-color:#111;" |
||
| + | |[[Frozen Ruins of Zahr-Kazaal]] || Party || One entry every 6 hours starting from 6:00 AM EST/EDT || Every day |
||
| + | |} |
||
[[Category:Dungeons]] |
[[Category:Dungeons]] |
||
Revision as of 17:44, 16 August 2017
Dungeons, or instances, are found anywhere in the world of Azuria, except in cities like Navea. Inside each location lies a Dungeon which is filled with elite monsters that give special equipment, quest completion, achievements, and help players gain even more experience. A dungeon quest is usually given at last before going to the next town.
Overview
These areas are the most strongest that players will have to create a group to fight together. Dungeons also give an opportunity to players for cooperation creating a party.
Players could accept a dungeon quest that either tells the player to form a party or just go by themself. Solo mode consists of weaker monsters and a shorter dungeon that is meant for one player. Party mode, along with Hell mode, gives the opportunity for players to join one another to form a maximum of five people per party and tackle the dungeon in Party or Hell mode.
Modes
- Solo - 1-player dungeon
- Party - 5-player dungeon
- Hell - 5-player dungeon
- Dimensional Hall - 3-player dungeon
Dungeons
Instances
| Dungeon | Modes | Location | Level requirement |
|---|---|---|---|
 |
Solo, Party, Hell | Crescent Hill | 28+ |
 |
Solo, Party, Hell | Cactakara Forest | 38+ |
 |
Solo, Party, Hell | Demarech Mines | 43+ |
 |
Solo, Party, Hell | Triatio Highlands | 48+ |
 |
Solo, Party, Hell | Candeo Marsh | 48+ |
 |
Solo, Party, Hell | Ventos Prairie | 53+ |
 |
Solo, Party, Hell | Oblitus Wood | 53+ |
 |
Solo, Party, Hell | Star Sand Desert | 53+ |
 |
Solo, Party, Hell | Rainmist Reach | 66+ |
 |
Solo, Party, Hell | Emerald Marsh | 66+ |
 |
Solo, Party, Hell | Silent Ice Field | 70+ |
 |
Solo, Party, Hell | Desolate Valley | 75+ |
 |
Solo, Party, Hell | Tanglevine Cascades | 80+ |
 |
Solo, Party, Hell | Sunhunter's Vale | 80+ |
 |
Solo, Party, Hell | Chronology Forest | 85+ |
 |
Solo, Party, Hell | Tempest Desert | 85+ |
3-player
- Main article: Dimensional Hall
Dimensional Hall is a three-player dungeon.
| Dungeon | Location | Level requirement |
|---|---|---|
 |
Crescent Hill | 20+ |
| Cactakara Forest | 35+ | |
| Candeo Marsh | 45+ | |
| Ventos Prairie | 55+ | |
| Rainmist Reach | 65+ | |
| Port Morton | 75+ | |
| Monster Research Institute | 99+ | |
Otherworld
Otherworld is a parallel version of the original dungeon. It contains stronger monsters than its counterpart.
| Dungeon | Modes | Location | Level requirement |
|---|---|---|---|
 |
Solo, Party | Cactakara Forest | 50+ |
 |
Solo, Party | Cactakara Forest | 60+ |
 |
Solo, Party | Cactakara Forest | 70+ |
 |
Solo, Party, Hell | Cactakara Forest | 75+ |
 |
Solo, Party, Hell | Cactakara Forest | 85+ |
|
Solo, Party, Hell | Crescent Hill | 60+ |
|
Solo, Party, Hell | Cactakara Forest | 60+ |
|
Solo, Party, Hell | Demarech Mines | 60+ |
|
Solo, Party, Hell | Triatio Highlands | 70+ |
|
Solo, Party, Hell | Candeo Marsh | 70+ |
|
Solo, Party, Hell | Rainmist Reach | 75+ |
|
Solo, Party, Hell | Emerald Marsh | 75+ |
|
Solo, Party, Hell | Desolate Valley | 80+ |
|
Solo, Party | Tanglevine Cascades | 85+ |
|
Solo, Party | Sunhunter's Vale | 85+ |
Other
| Dungeon | Modes | Location | Level requirement |
|---|---|---|---|
| Ruins Cave | Solo | Port Skandia | 1+ |
| Hidden Cave | Solo | Port Skandia | 9+ |
| Southwest Helonia Mountain Cave | Solo | Helonia Coast | 10+ |
| North Helonia Mountain Cave | Solo | Helonia Coast | 15+ |
| Former Site of Lunarin Village | Solo | Crescent Hill | 20+ |
| Temple of the Eidolons | Solo | Crescent Hill | 30+ |
| Holy Land of Gaia | Solo | Crescent Hill | 70+ |
| Gaia's Sanctuary | Party | Crescent Hill | 70+ |
| Infernal Abyss | Solo, Party | Ventos Prairie | 55+ |
| Whirlpool Abyss | Solo, Party | Helonia Coast | 60+ |
| Dark Shadow Abyss | Solo | Viridian Steppe | 75+ |
| Avarice Abyss | Solo Challenge, Party, Hell | Viridian Steppe | 75+ |
| Vault of Eternity | Solo | Sunhunter's Vale | 80+ |
| Abyss of Light | Solo, Party, Hell | Chronology Forest | 85+ |
| Lament of the Thunder-Dragon King | Party | Crescent Hill | 65+ |
| Landing of the Sky Dragon King | Party | Cactakara Forest | 65+ |
| Siege of the Aqua-Dragon Queen | Party | Demarech Mines | 65+ |
| Thunder Temple of the Underworld Baroness | Party | Ventos Prairie | 75+ |
| Subterranean Ruins | Solo | Star Sand Desert | 50+, 60+, 70+ |
| Hall of Philae | Solo | Star Sand Desert | 65+ |
| Fight Club | Solo | Navea | 50+ |
| Duelists' Temple | Solo | Navea | 65+ |
| Sky Tower | Raid | Navea | 60+ |
| Pyroclastic Purgatory | Party | Oblitus Wood | 70+ |
| Tempestuous Temple | Party | Star Sand Desert | 70+ |
| Dark Thunder Temple | Party | Ventos Prairie | 75+ |
Dungeon resets
Times are based on Eastern Time (GMT -5 EST/ GMT -4 EDT), the server time.
| Type of dungeon | Mode | Reset time | Availability |
|---|---|---|---|
| Regular dungeons | Solo, Solo Challenge, Party, Hell | One entry every 2 hours starting from 6:00 AM EST/EDT | Every day |
| Temple of the Eidolons | Solo | One entry every 6 hours starting from 6:00 AM EST/EDT | Every day |
| Holy Land of Gaia | Solo | One entry every 24 hours starting from 6:00 AM EST/EDT | Every day |
| Gaia Sanctuary | Solo, Trial 5-players, 5-players | One entry every 24 hours starting from 6:00 AM EST/EDT | Every day |
| Otherworld: Port Skandia | Solo, Solo Challenge, Party, Hell | One entry every 3 hours starting from 6:00 AM EST/EDT | Every day |
| Otherworld: Helonia Coast | |||
| Otherworld: Crescent Hill | |||
| Otherworld: Emerald Marsh | |||
| Otherworld: Alabastren Temple | Solo, Party | One entry every 2 hours starting from 6:00 AM EST/EDT | Every day |
| Solo Challenge, Hell | One entry every 3 hours starting from 6:00 AM EST/EDT | Every day | |
| Otherworld: Gydaie Glen | Solo, Party | One entry every 2 hours starting from 6:00 AM EST/EDT | Every day |
| Solo Challenge, Hell | One entry every 3 hours starting from 6:00 AM EST/EDT | Every day | |
| Otherworld: Miner's Steppe | Solo, Party | One entry every 2 hours starting from 6:00 AM EST/EDT | Every day |
| Solo Challenge, Hell | One entry every 3 hours starting from 6:00 AM EST/EDT | Every day | |
| Otherworld: Candeo Core | Solo, Party | One entry every 2 hours starting from 6:00 AM EST/EDT | Every day |
| Solo Challenge, Hell | One entry every 3 hours starting from 6:00 AM EST/EDT | Every day | |
| Otherworld: Deep's Cavern | Solo, Party | One entry every 2 hours starting from 6:00 AM EST/EDT | Every day |
| Solo Challenge, Hell | One entry every 3 hours starting from 6:00 AM EST/EDT | Every day | |
| Otherworld: Titan's Roots | Solo, Party | One entry every 2 hours starting from 6:00 AM EST/EDT | Every day |
| Solo Challenge, Hell | One entry every 3 hours starting from 6:00 AM EST/EDT | Every day | |
| Otherworld: Cadilla Felwood | Solo, Party | One entry every 2 hours starting from 6:00 AM EST/EDT | Every day |
| Solo Challenge, Hell | One entry every 3 hours starting from 6:00 AM EST/EDT | Every day | |
| Sky Tower | Raid | -- | Saturday and Sunday |
| Fight Club | Solo | Unlimited entries | Every day |
| Hall of Philae | Solo | One entry every 24 hours starting from 6:00 AM EST/EDT | Every day |
| Duelists' Temple | Solo | One entry every 24 hours starting from 6:00 AM EST/EDT | Every day |
| Infernal Abyss | Solo, Party | One entry every 8 hours starting from 6:00 AM EST/EDT | Every day |
| Whirlpool Abyss | Solo, Party | Every day | |
| Dark Shadow Abyss Avarice Abyss |
Solo, Solo Challenge, Party, Hell | Every day | |
| Lament of the Thunder-Dragon King | Party | One entry every 6 hours starting from 6:00 AM EST/EDT | Every day |
| Landing of the Sky Dragon King | Party | Every day | |
| Siege of the Aqua-Dragon Queen | Party | Every day | |
| Thunder Temple of the Underworld Baroness | Party | Every day | |
| Tempestuous Temple | Party | One entry every 6 hours starting from 6:00 AM EST/EDT | Every day |
| Pyroclastic Purgatory | Party | One entry every 6 hours starting from 6:00 AM EST/EDT | Every day |
| Frozen Ruins of Zahr-Kazaal | Party | One entry every 6 hours starting from 6:00 AM EST/EDT | Every day |